
Guide (basic)
Before you start using Live Switcher Mobile
- When using Live Switcher Mobile, install the app on all smartphones you will be connecting.
- The Live Switcher Mobile app does not provide live streaming services. To live stream, you will need to set up a video streaming platform like YouTube separately.
- In this guide, the smartphone used for switching screens and streaming is referred to as the "main smartphone," and the smartphone used as a camera to send images to the main smartphone is referred to as the "secondary smartphone."
-
Live streaming on the plattforms may change, stop, or terminate without notice. Please confirm their latest streaming condition.
Please note in advance that Canon does not assume any responsibilities for services provided by third parties.
Compatible camera models
- For supported models, see here. [click here]
Items required
- The camera and smartphone (iPhone, iPad) must be connected to the same network, requiring a Wi-Fi router connection.
-
The following steps explain the connection procedure using one Canon camera as an example. You can connect up to three cameras, and you can also use them together with a smartphone.
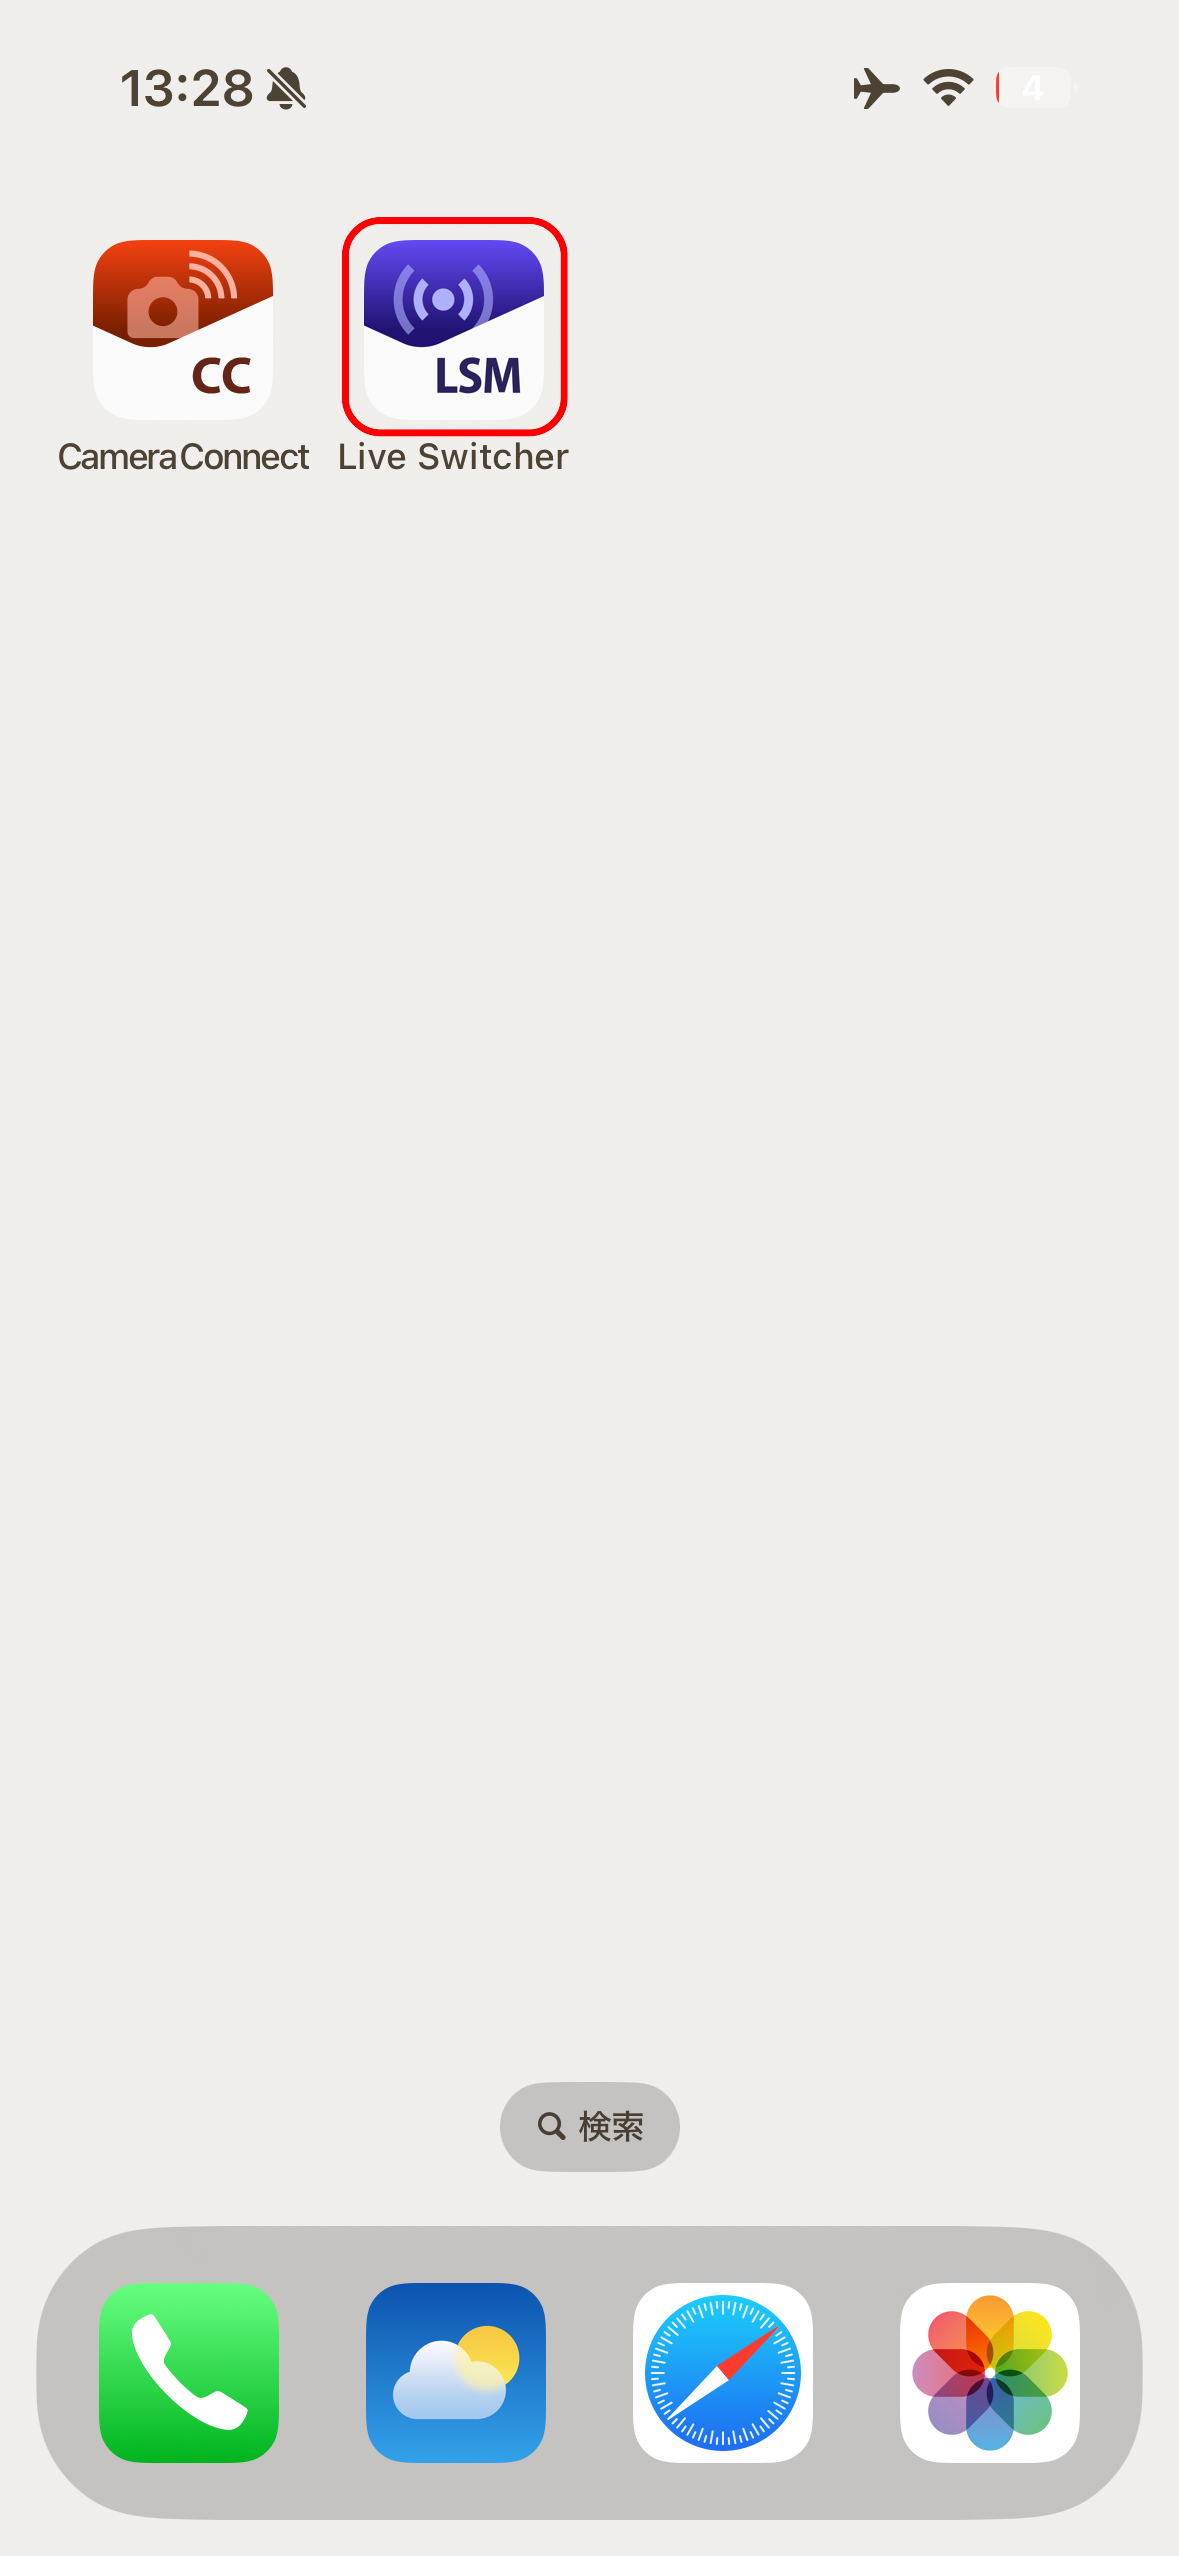
- To connect to a Canon camera, please install the app (Ver. 1.1 or later) in advance.
First, we will introduce the steps to power on the Canon camera and set it up to connect to Live Switcher Mobile.
Example: EOS R50 V
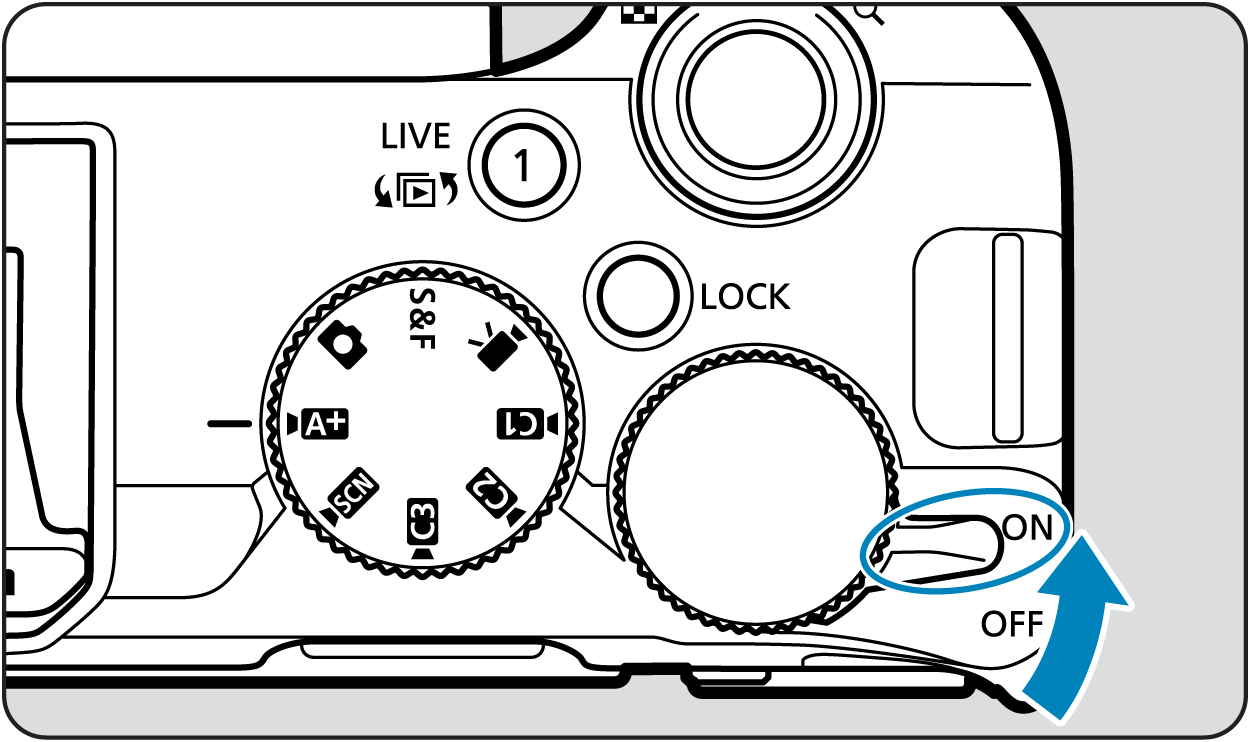
Turn on the Camera Power.
Example: EOS R50 V
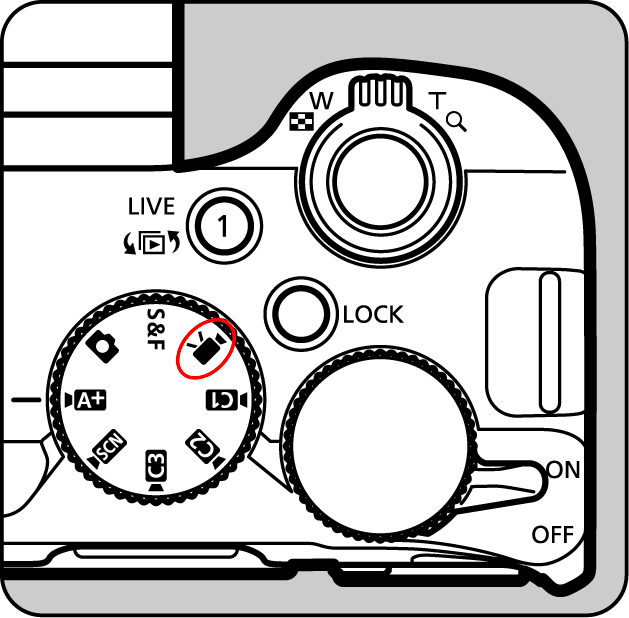
Switch to "Shooting mode".
Example: EOS R50 V
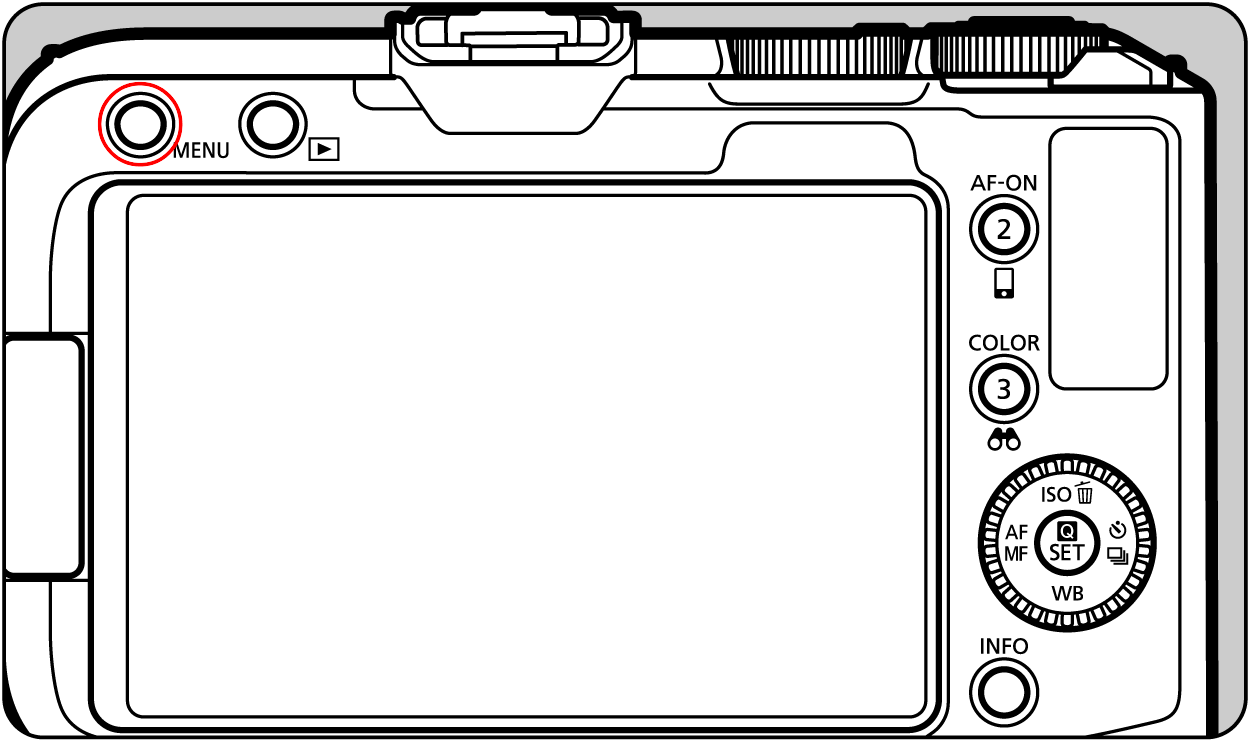
Press the "MENU Button".
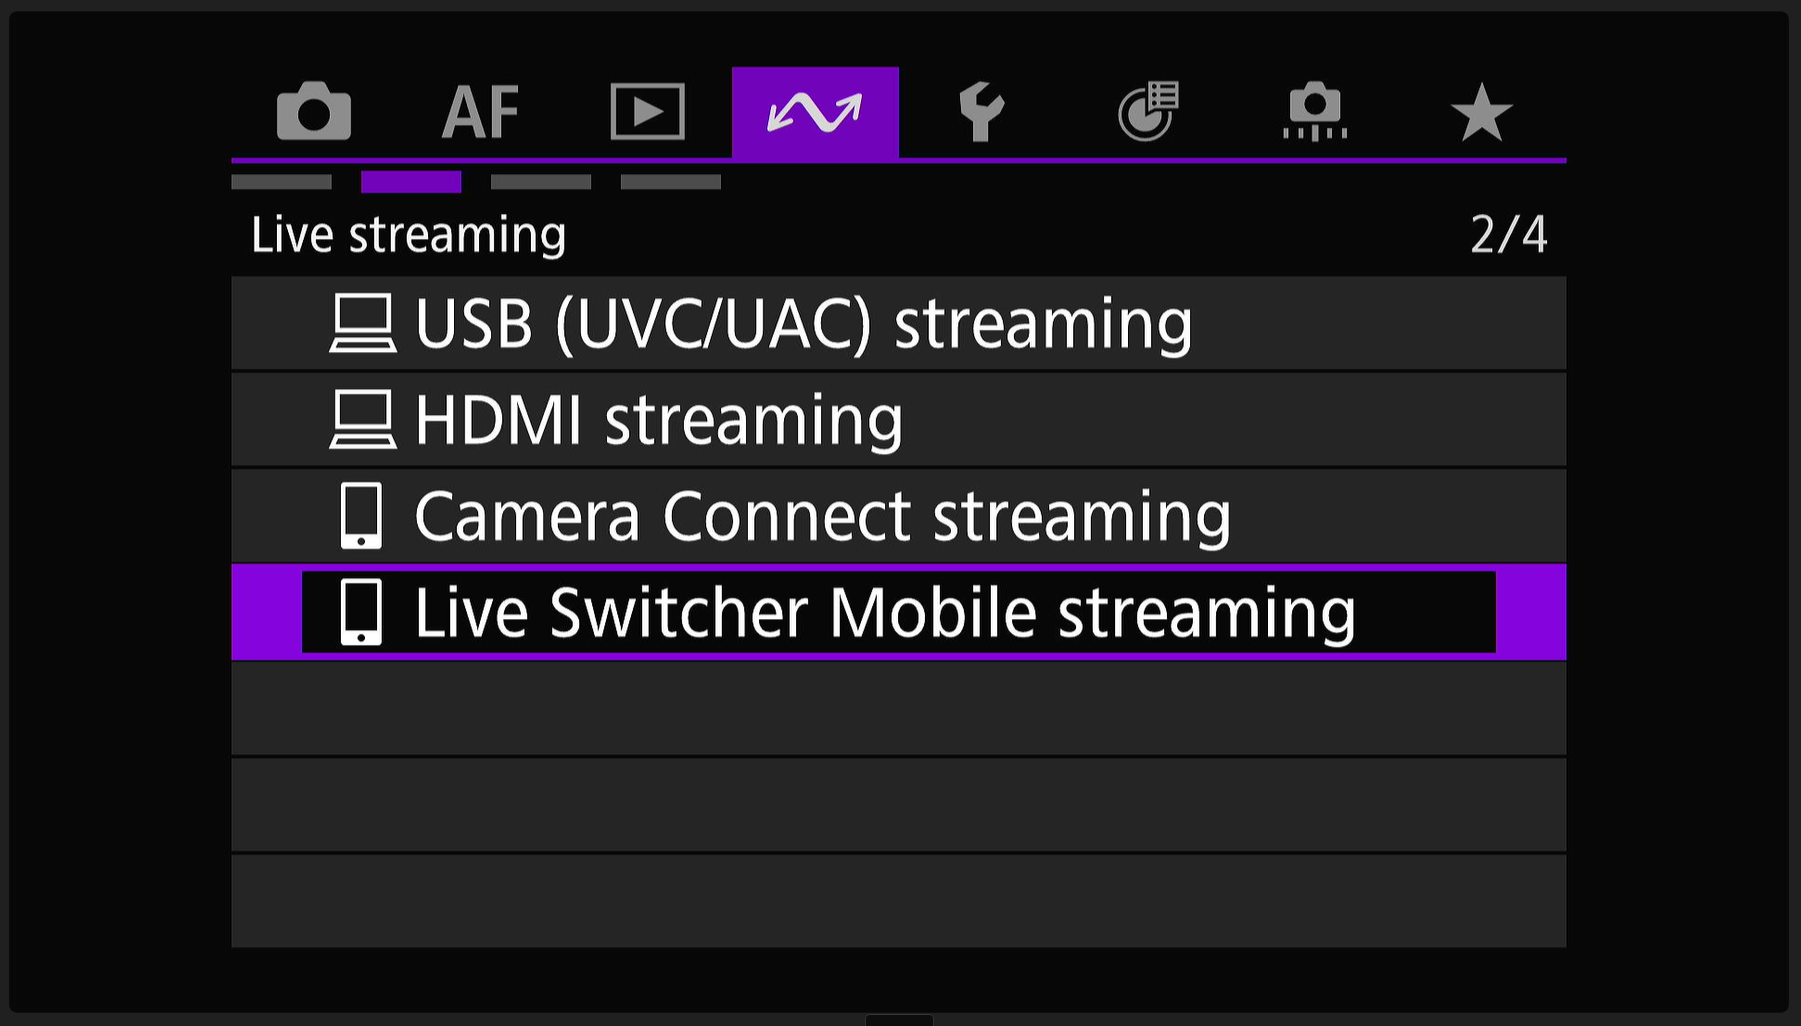
Select the "Live Switcher Mobile streaming" menu displayed on the camera's rear LCD screen under the communication functions tab.
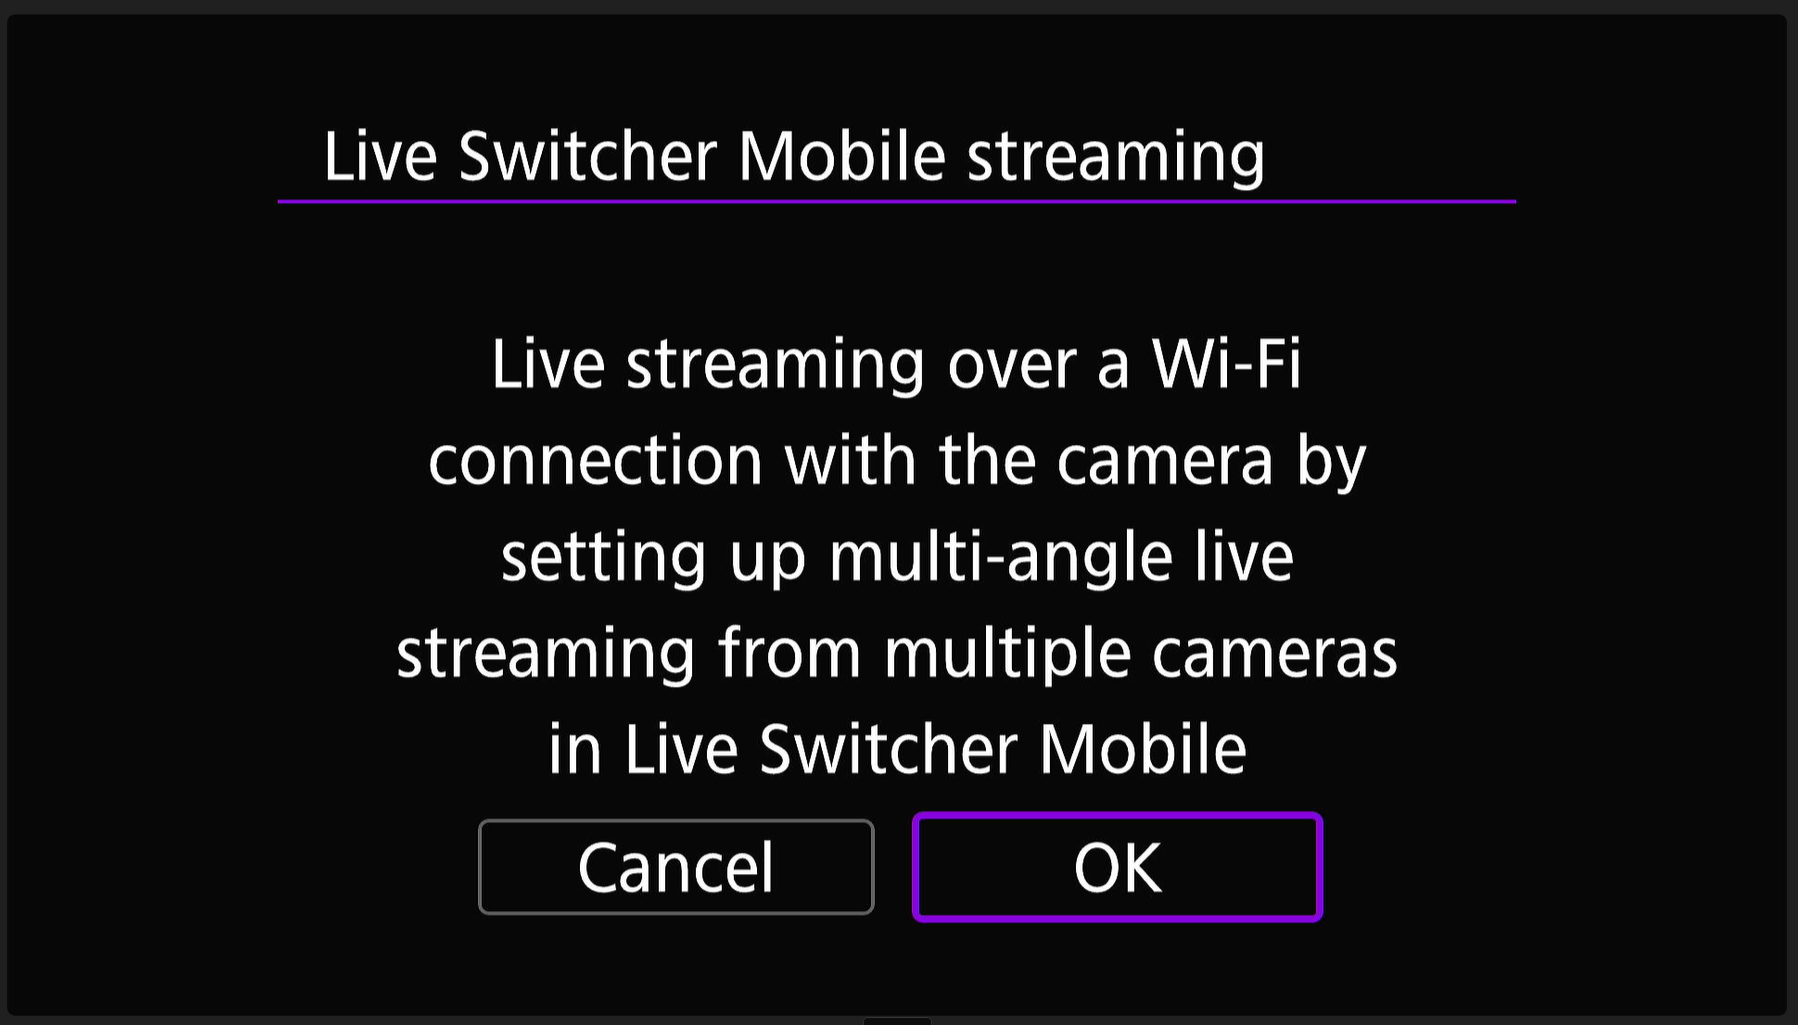
Press the "OK" button.
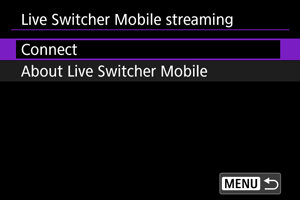
Select the "Connect" menu.
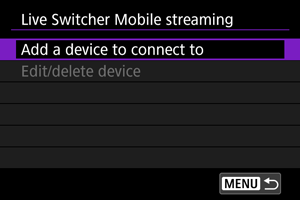
Select the "Add a device to connect to" menu.
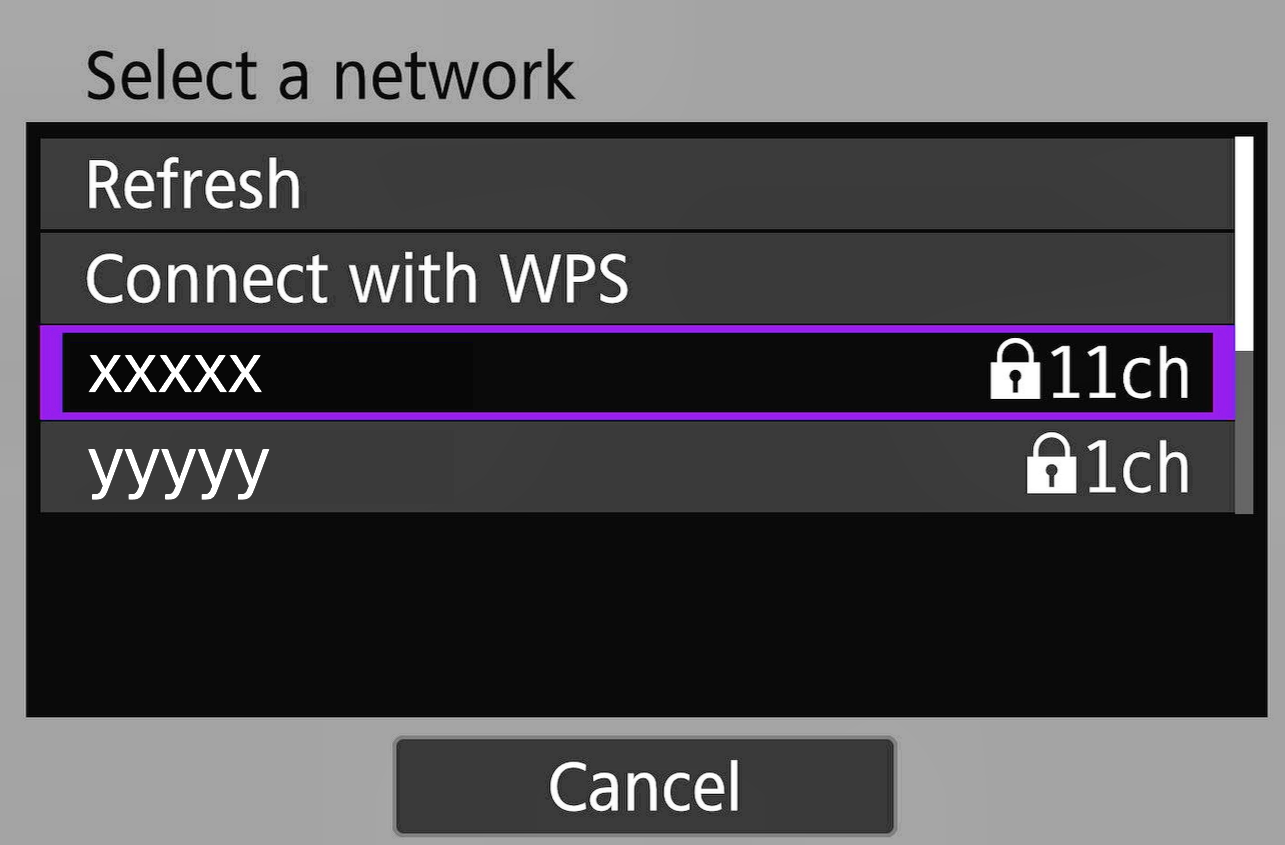
Select the same network to which the smartphone is connected.
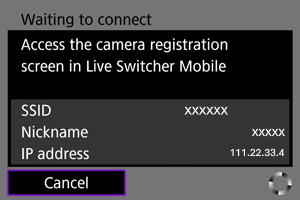
Once the connection standby screen is displayed, proceed to the settings of Live Switcher Mobile.
Next, we will introduce the steps to launch Live Switcher Mobile and display the Canon camera's feed.
Launch Live Switcher Mobile.
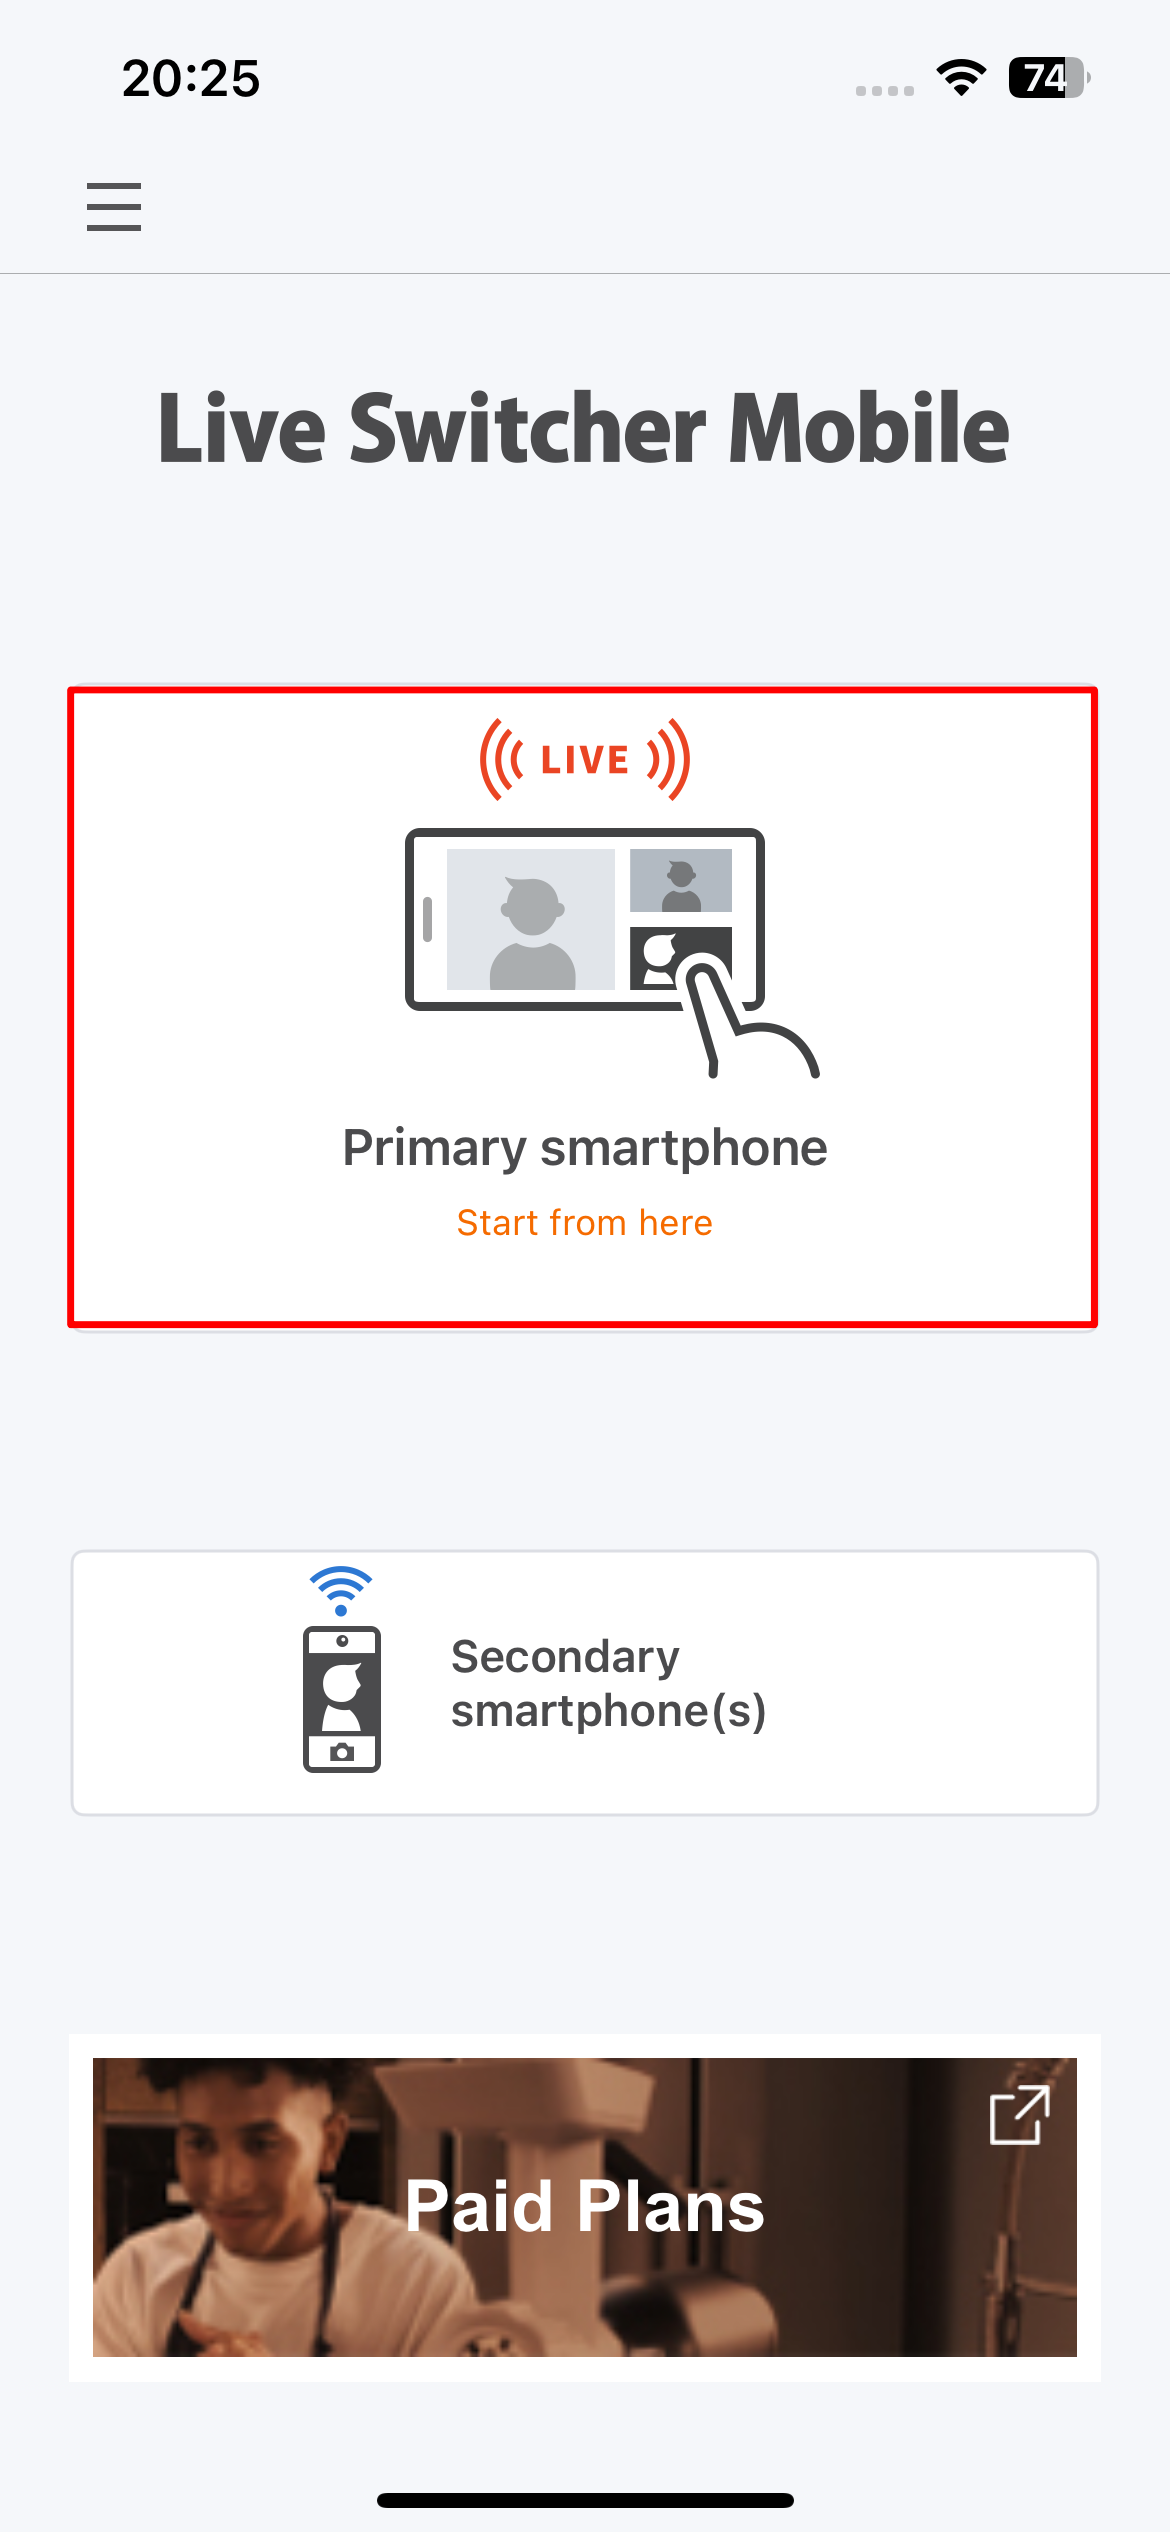
Tap the "Primary smartphone" button.
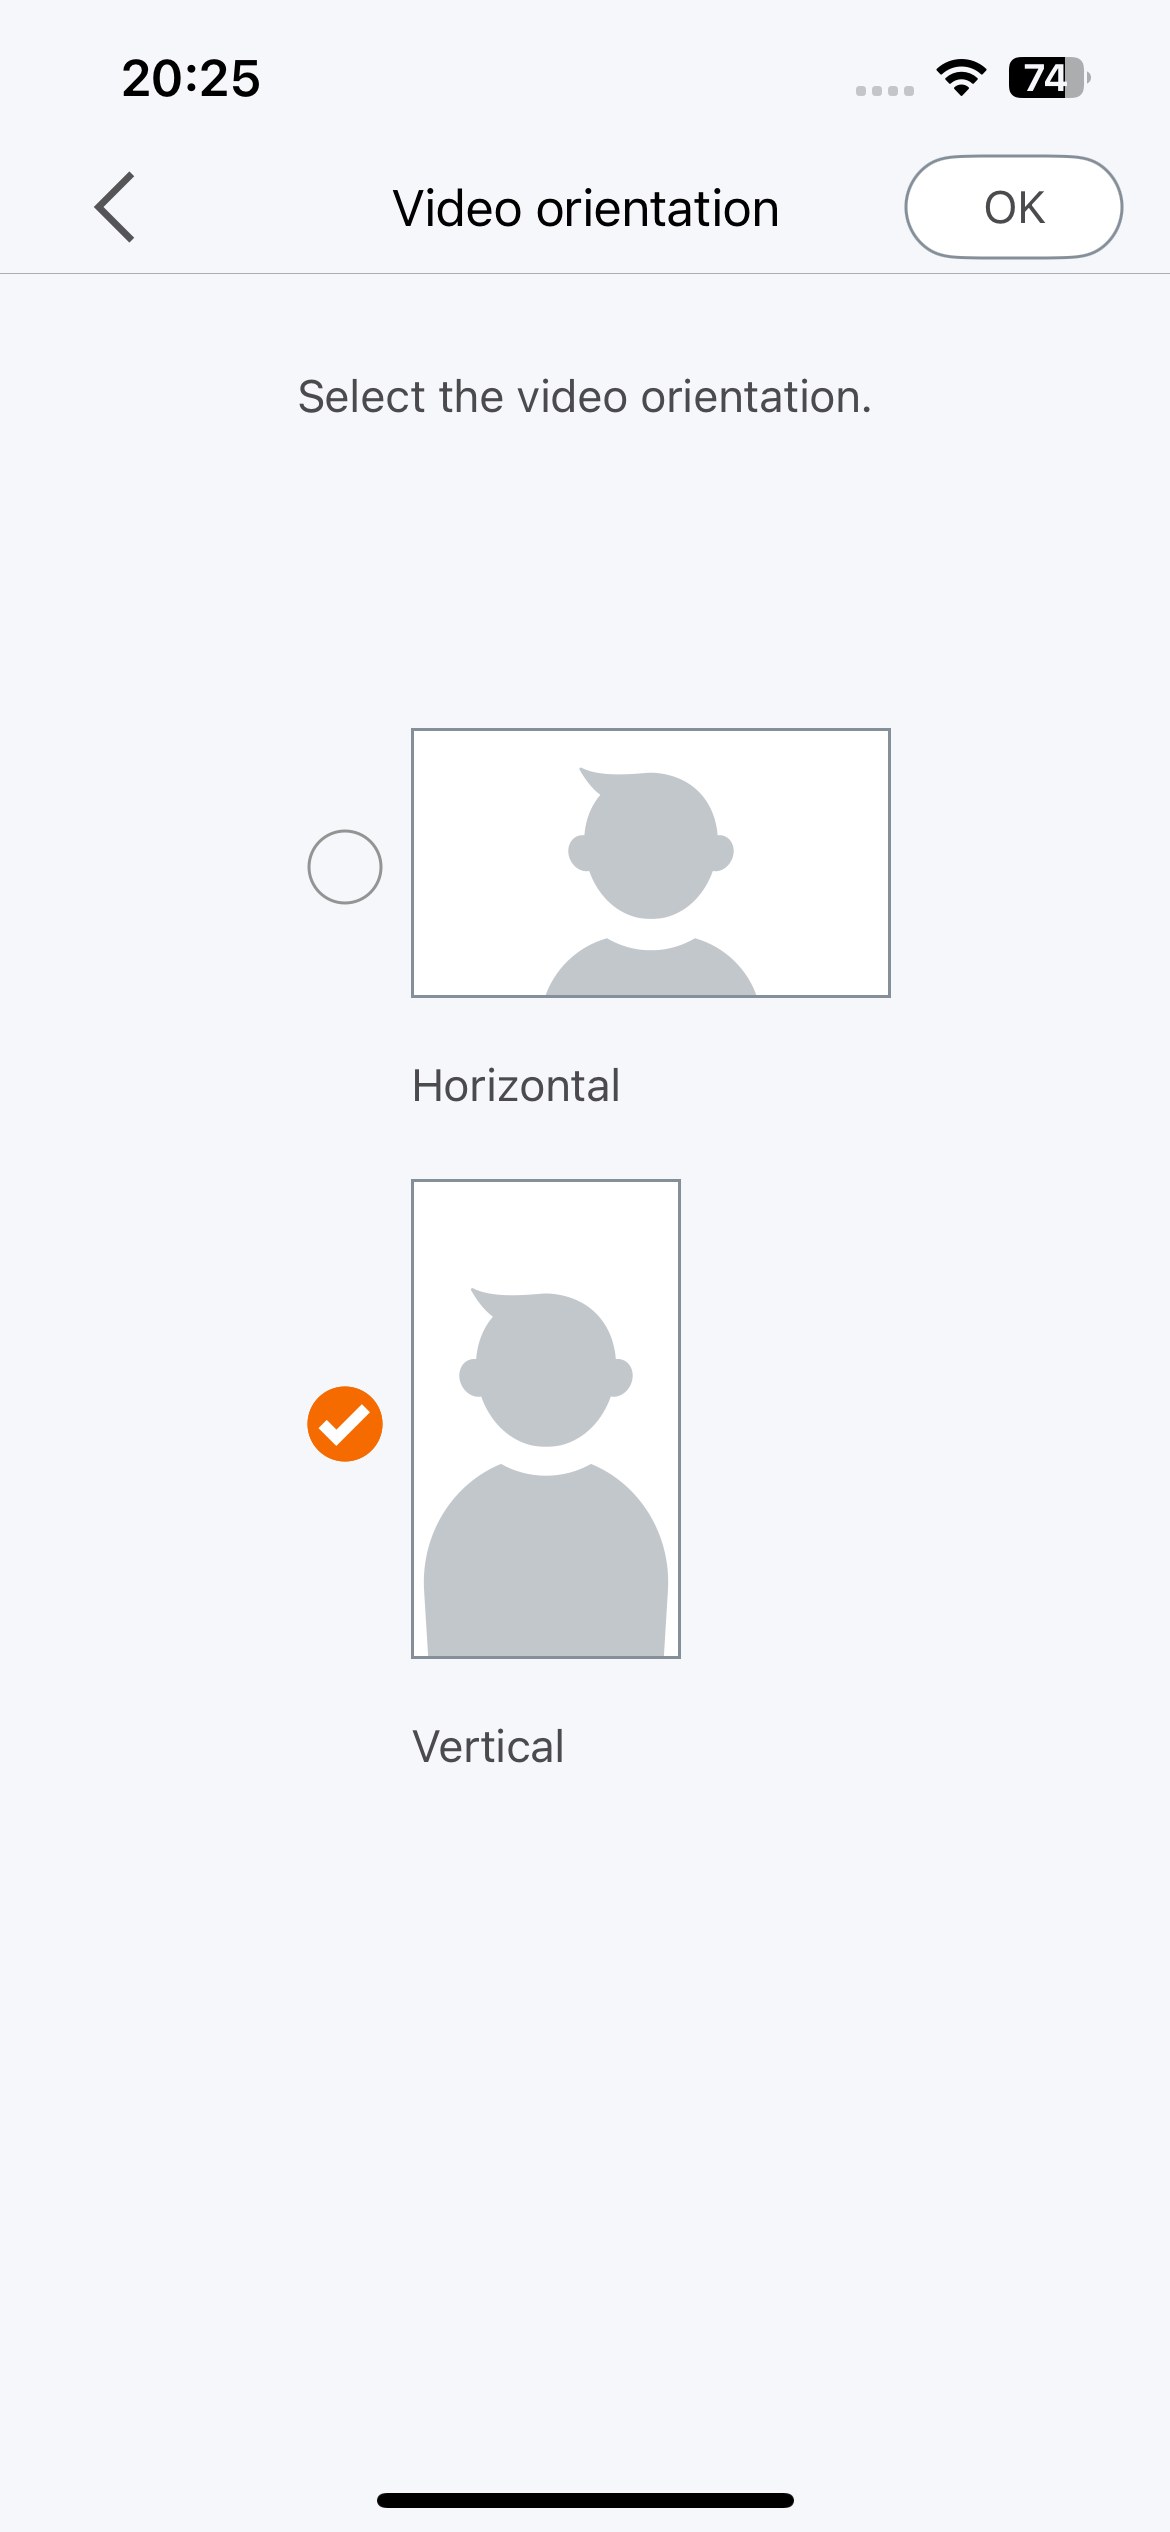
Choose whether to stream vertically or horizontally and tap the "OK" button.
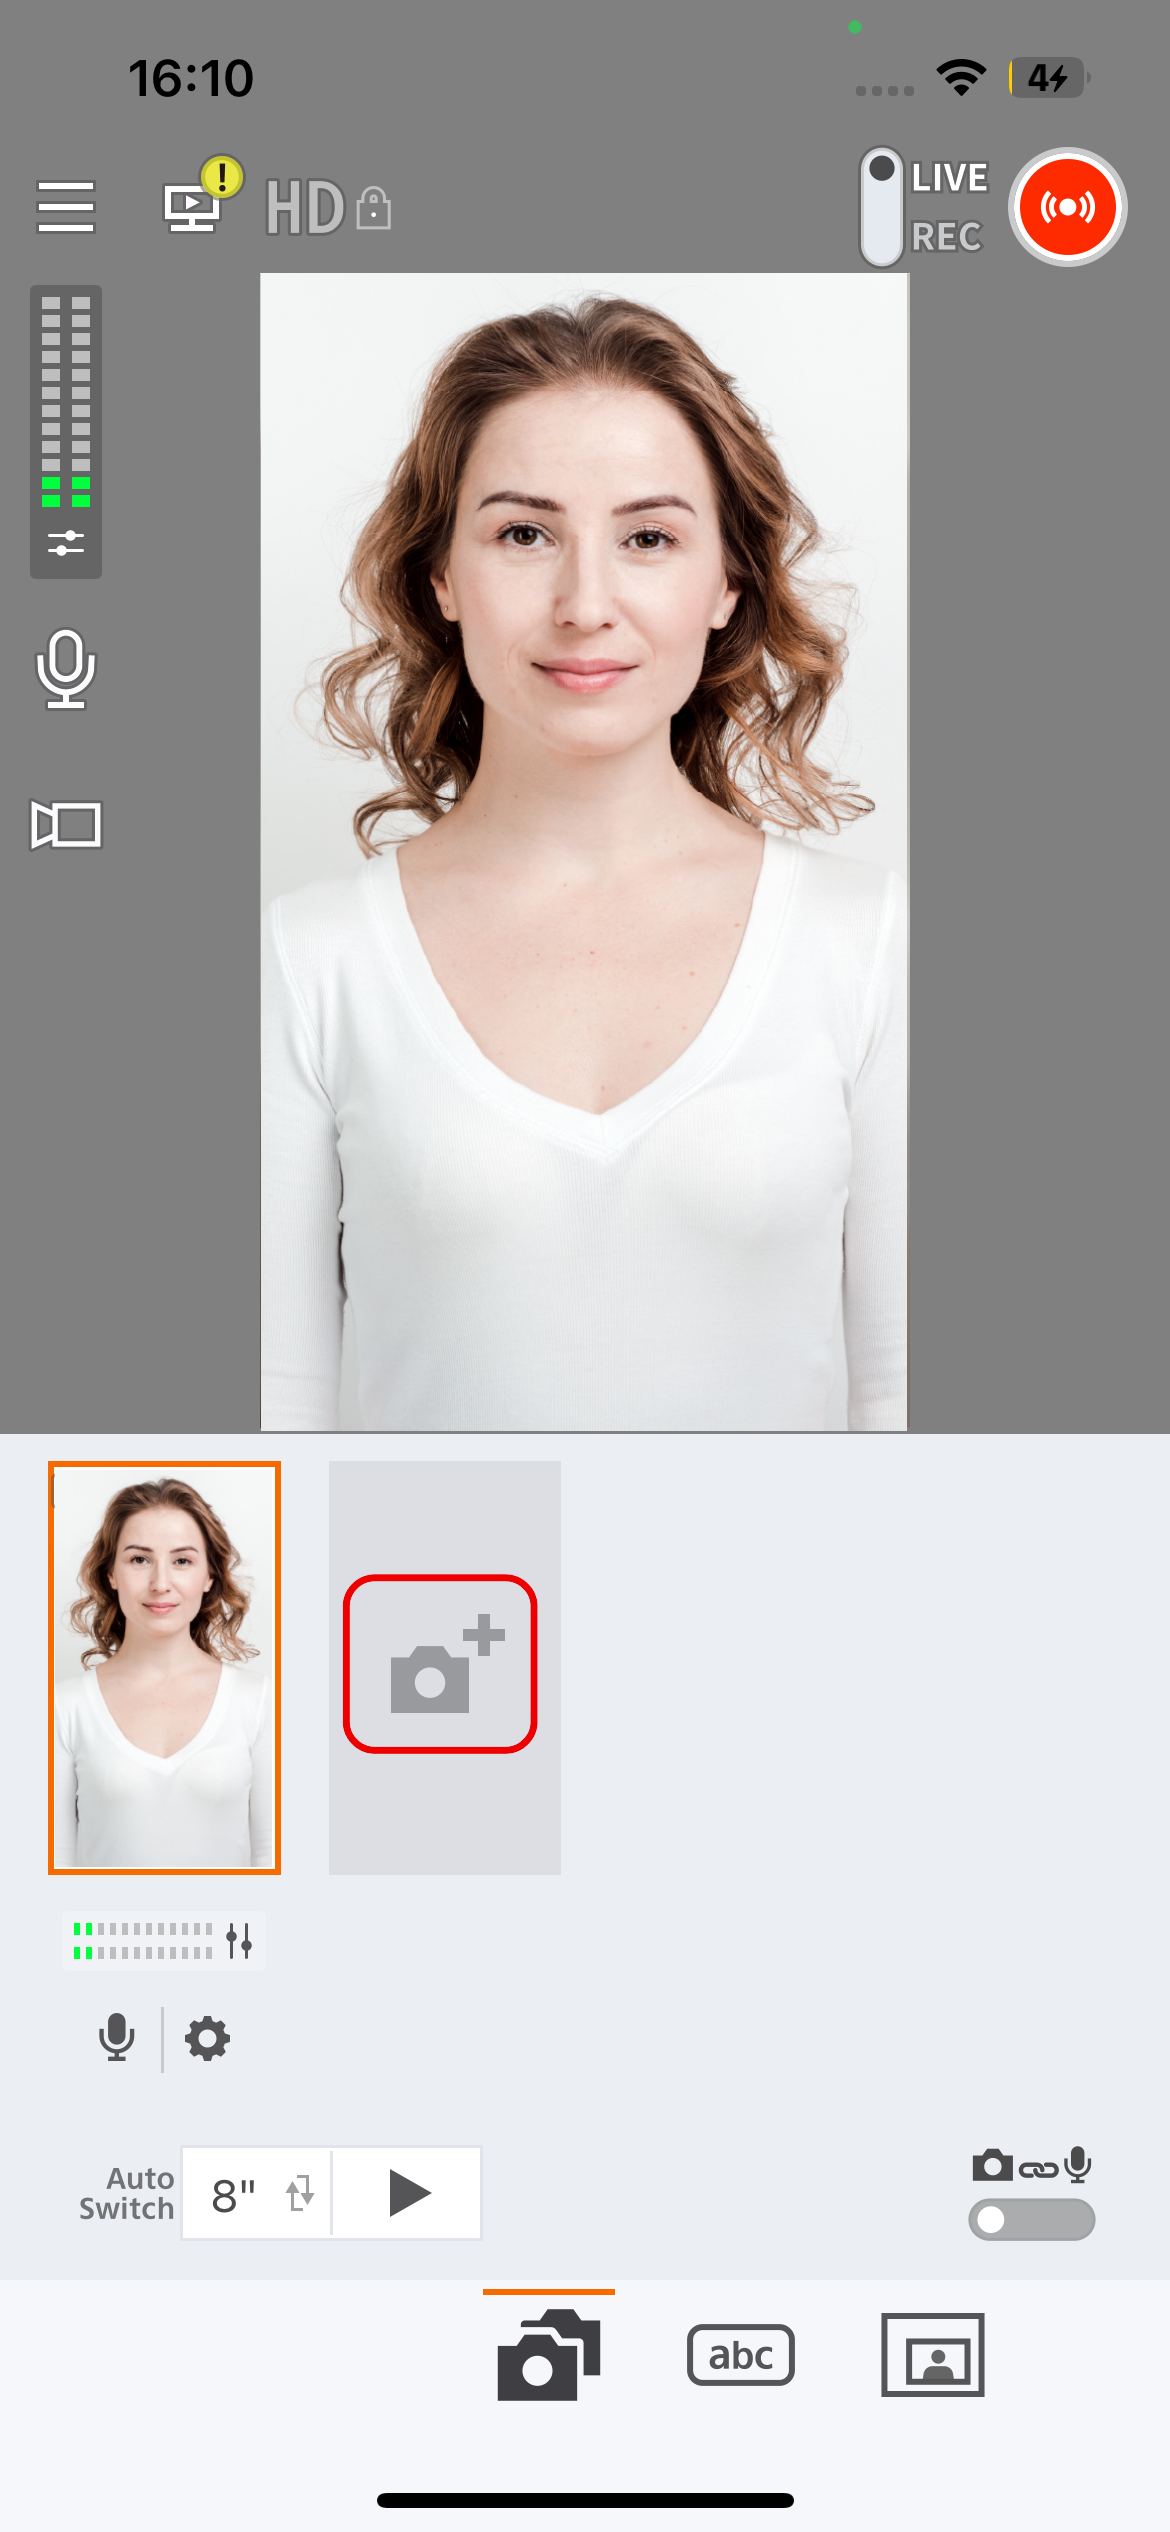
Tap the "Add Camera" button.
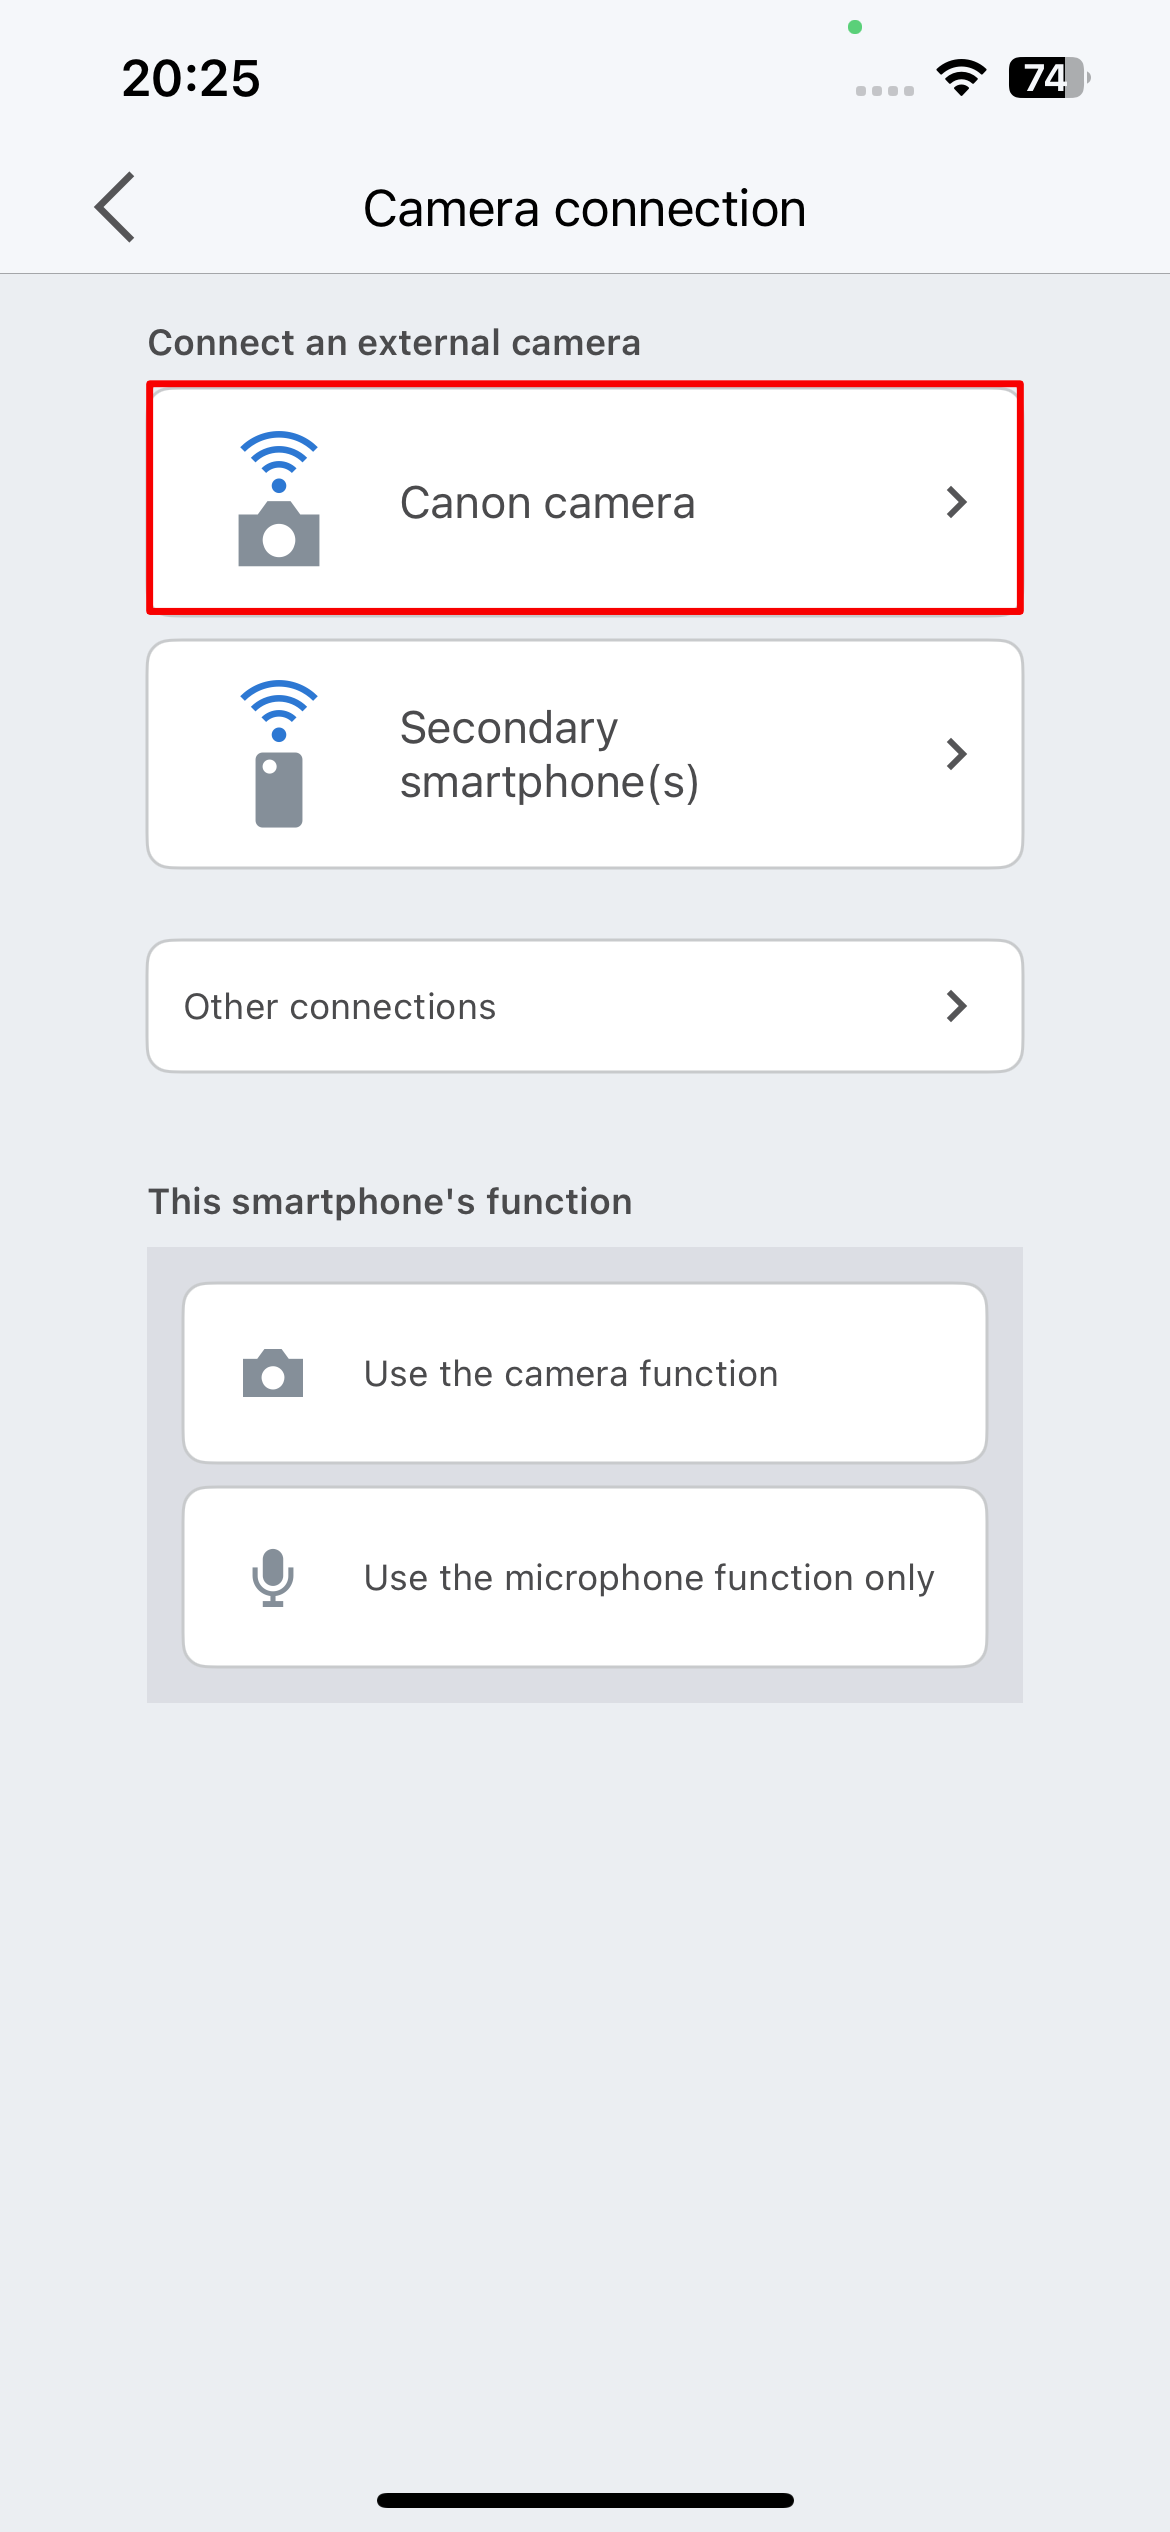
Tap the "Canon Camera" button.
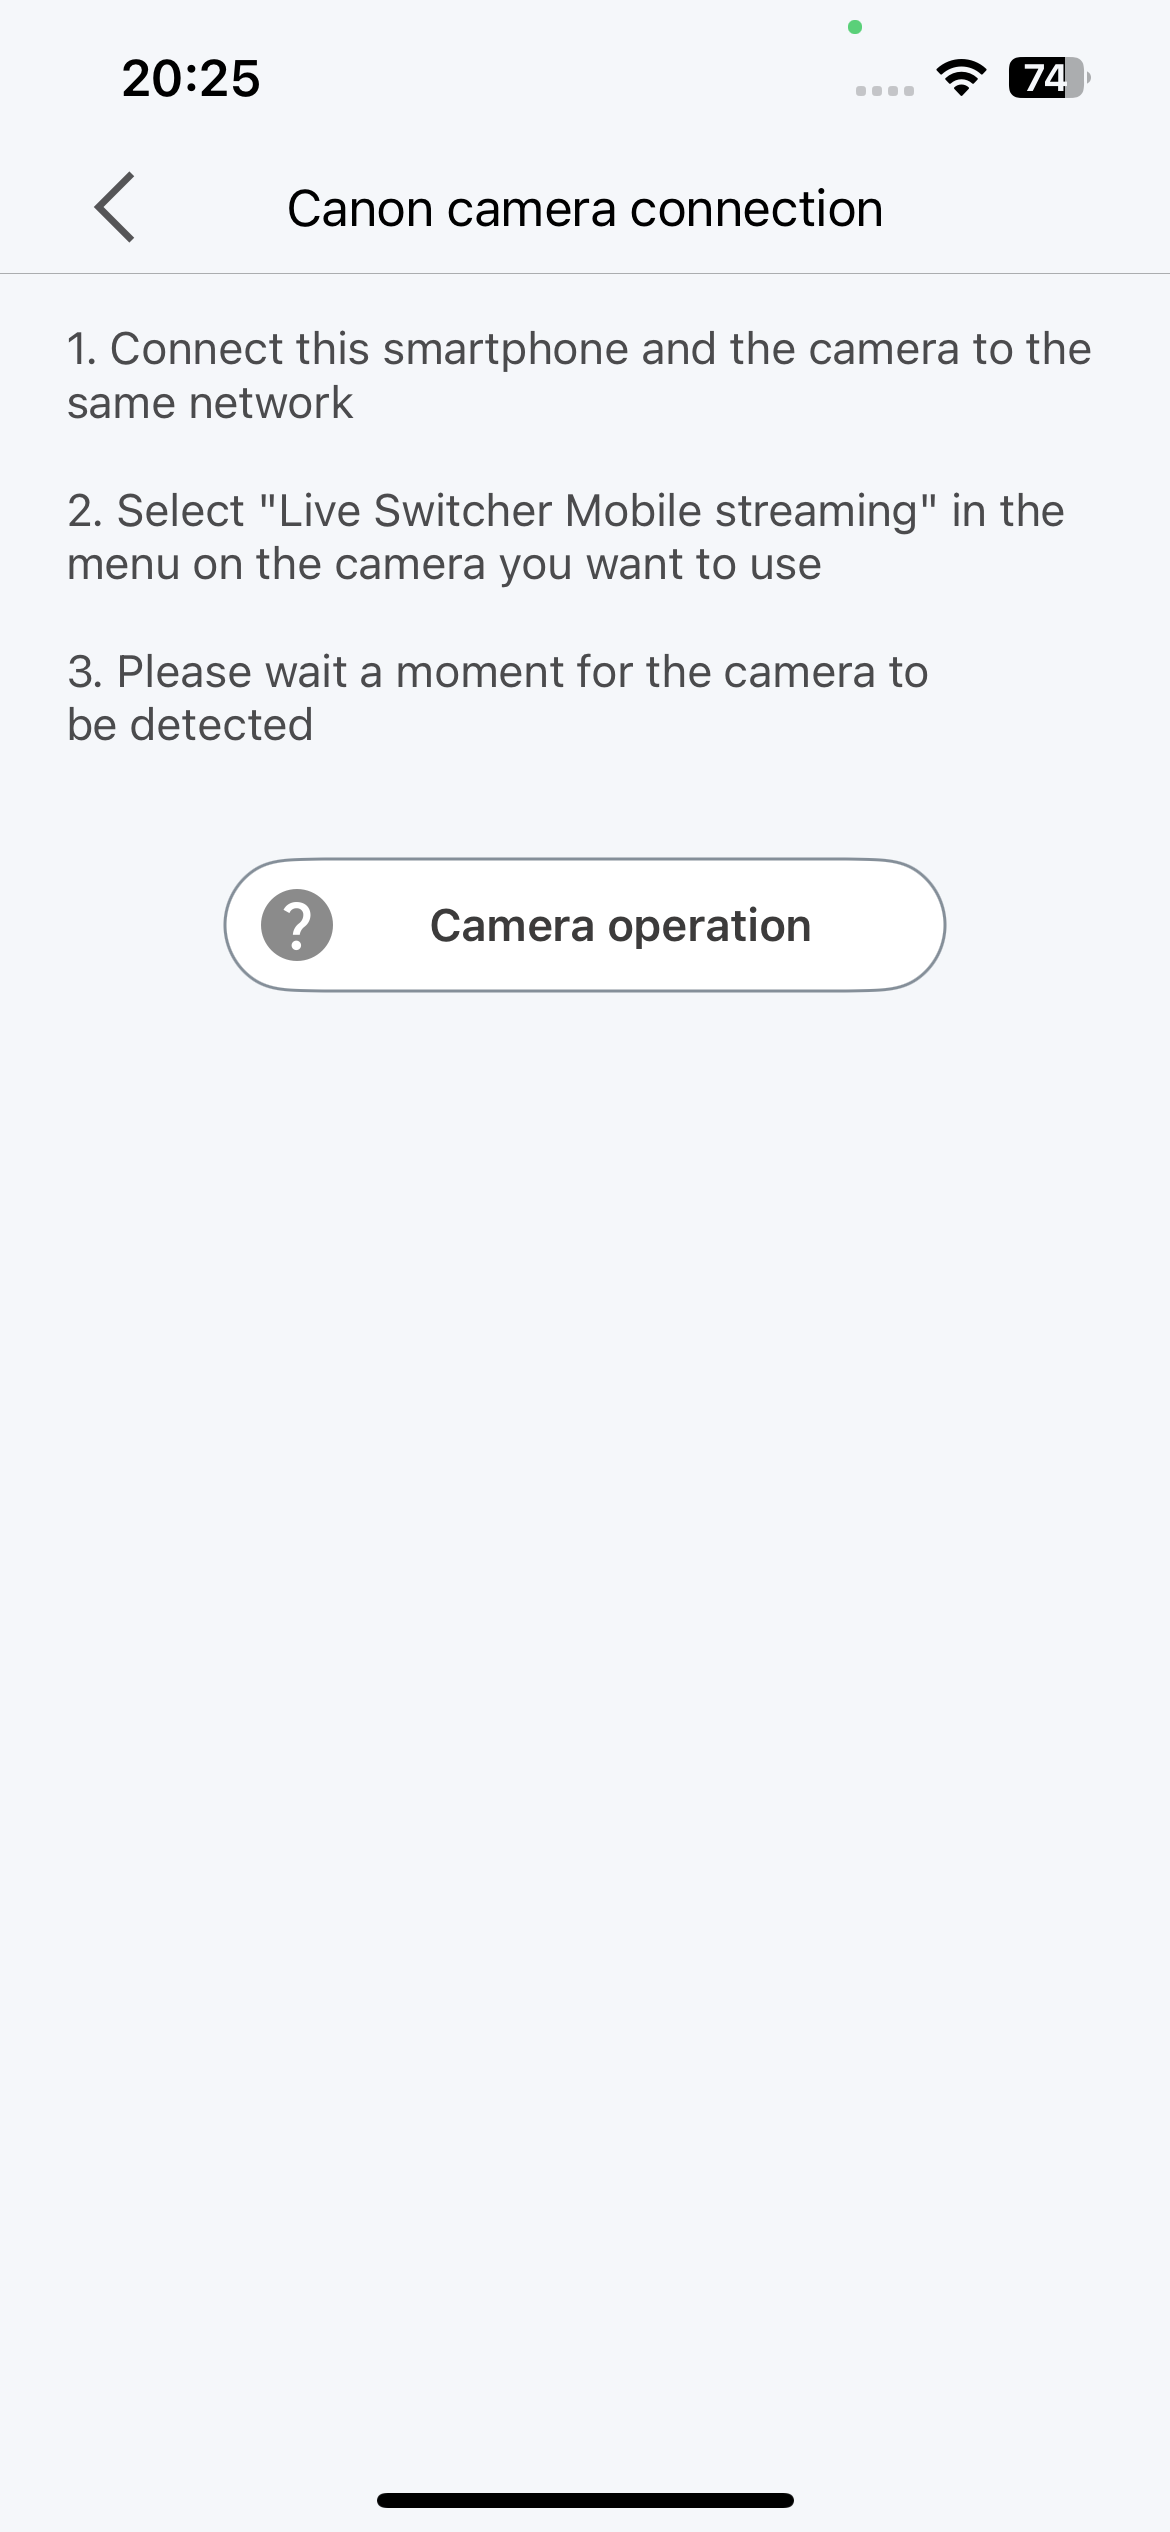
The connection standby screen will be displayed, so wait in this state until the camera is detected.
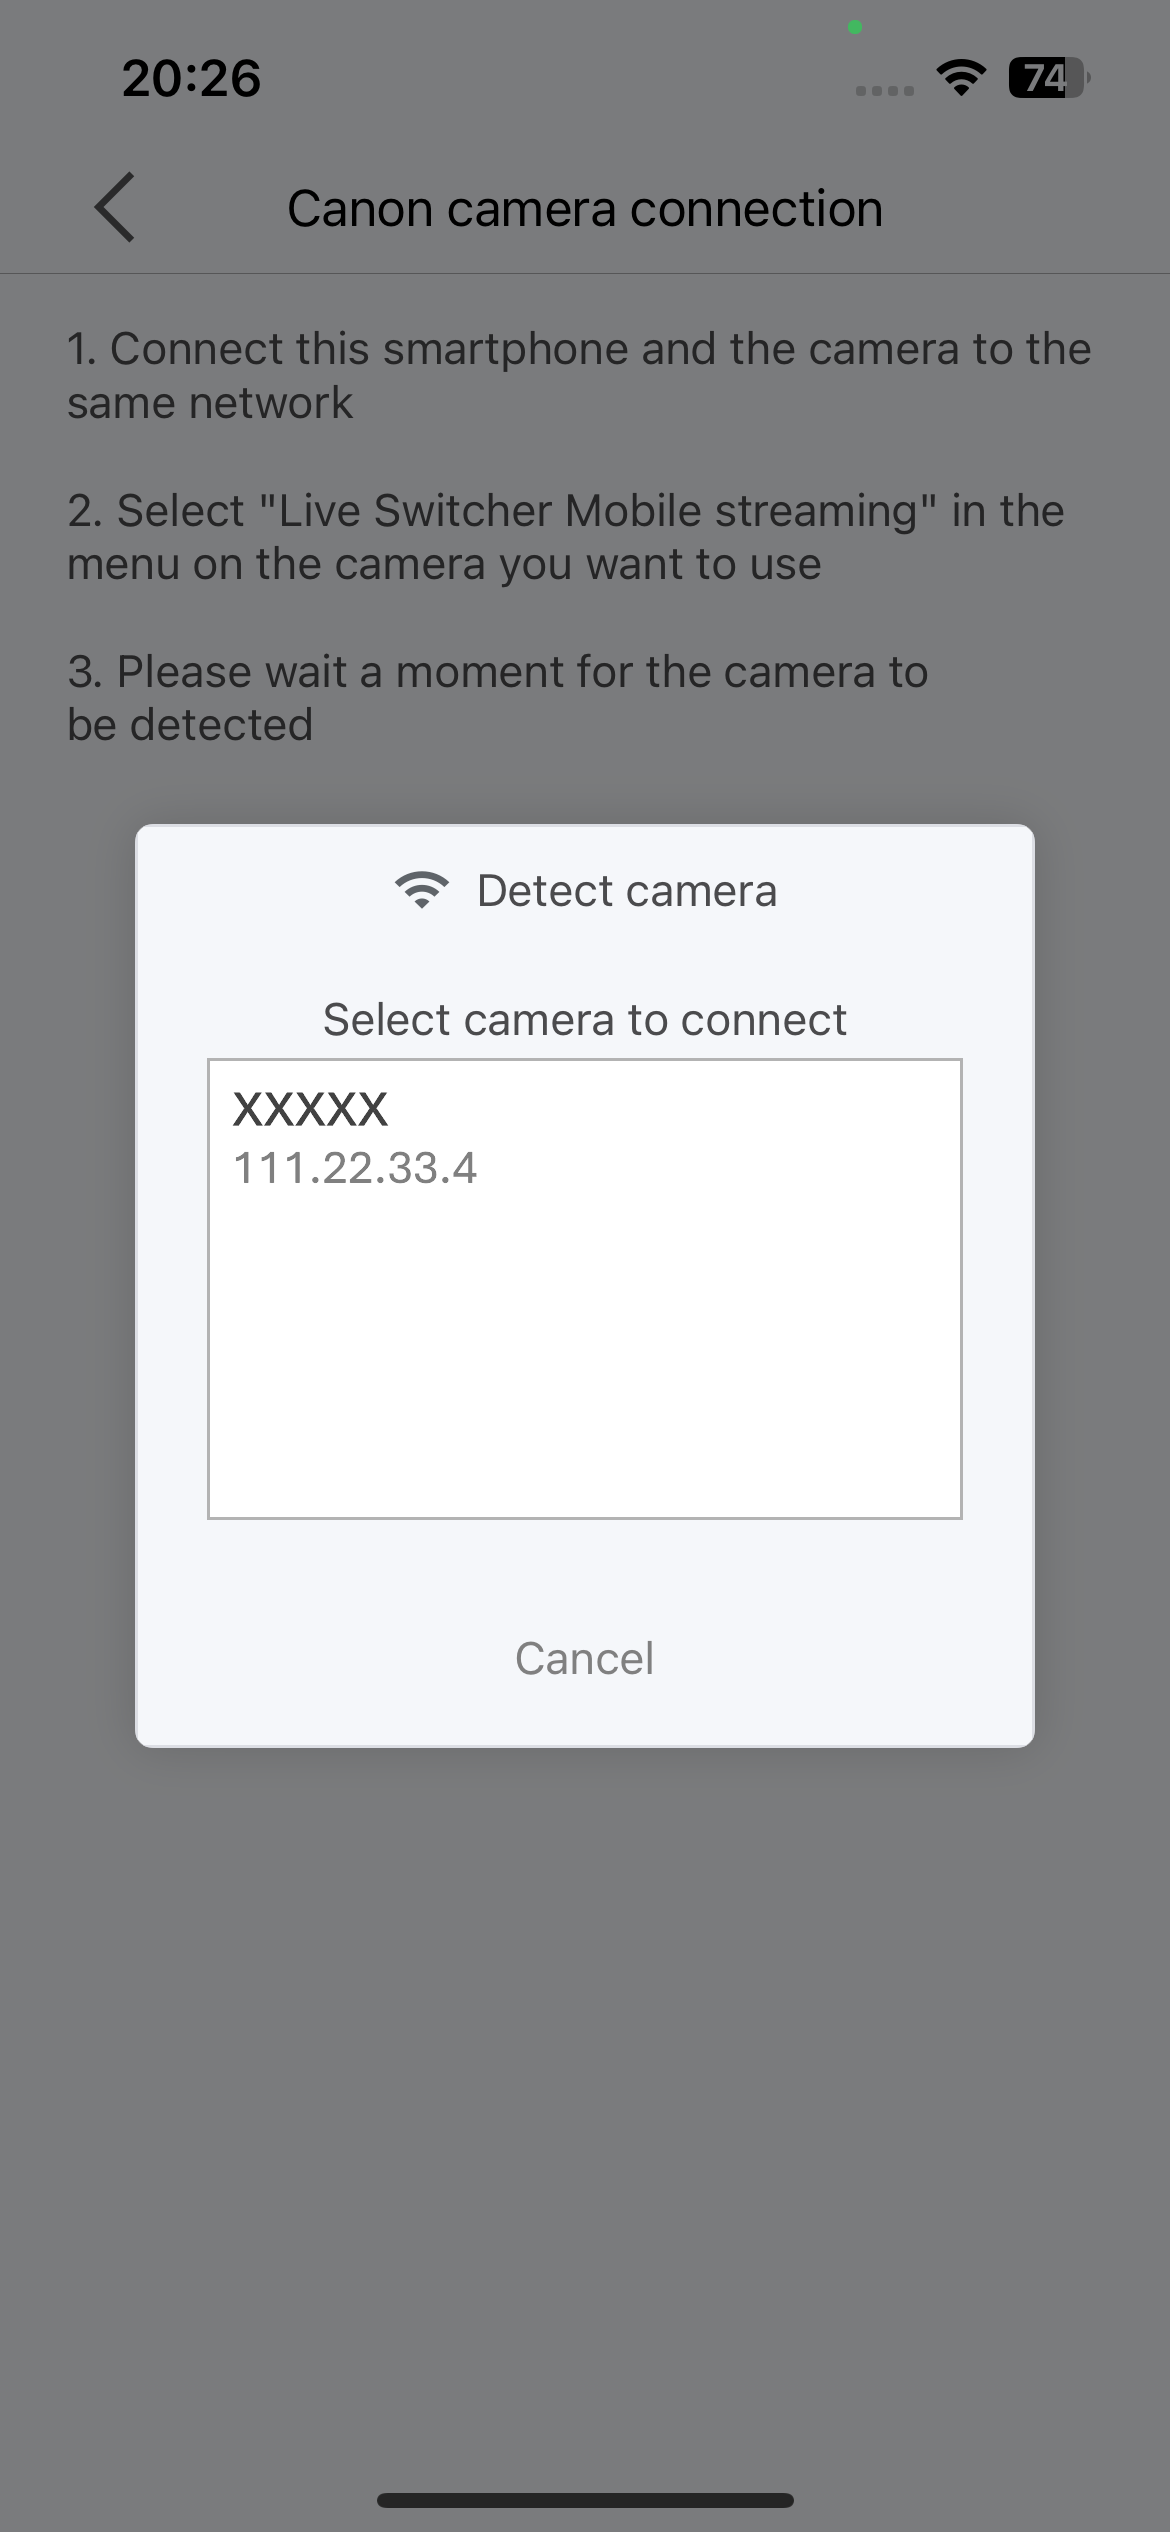
Tap the name of the camera to connect.
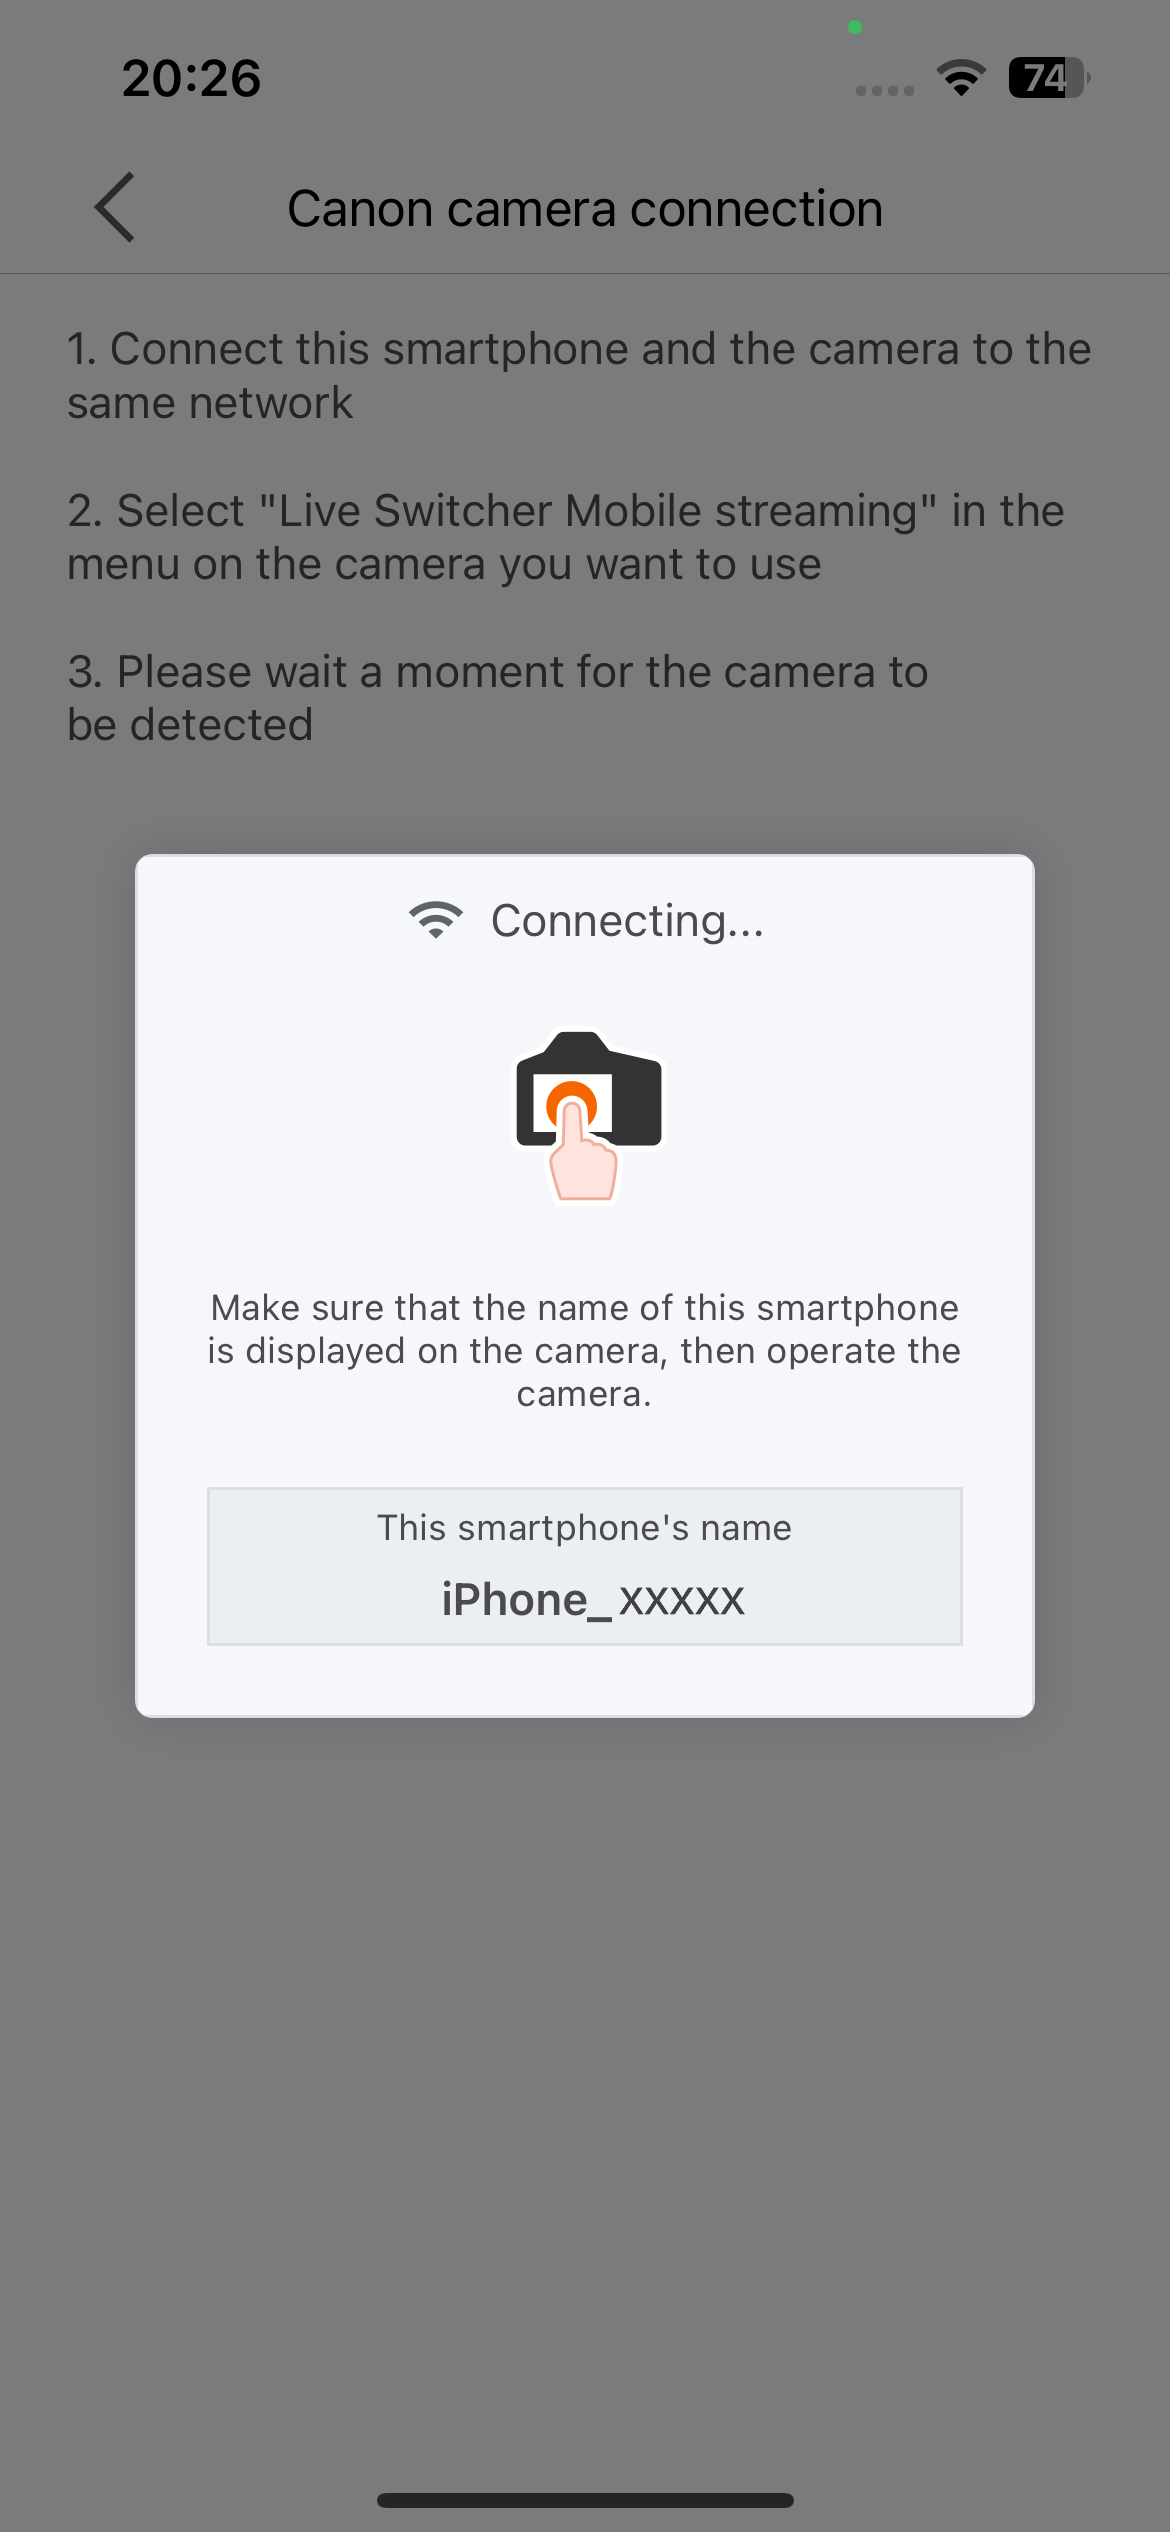
Confirm that the smartphone name is displayed, then proceed to the camera operation.

Confirm that the smartphone name displayed on Live Switcher Mobile is the same, and press the "OK" button.
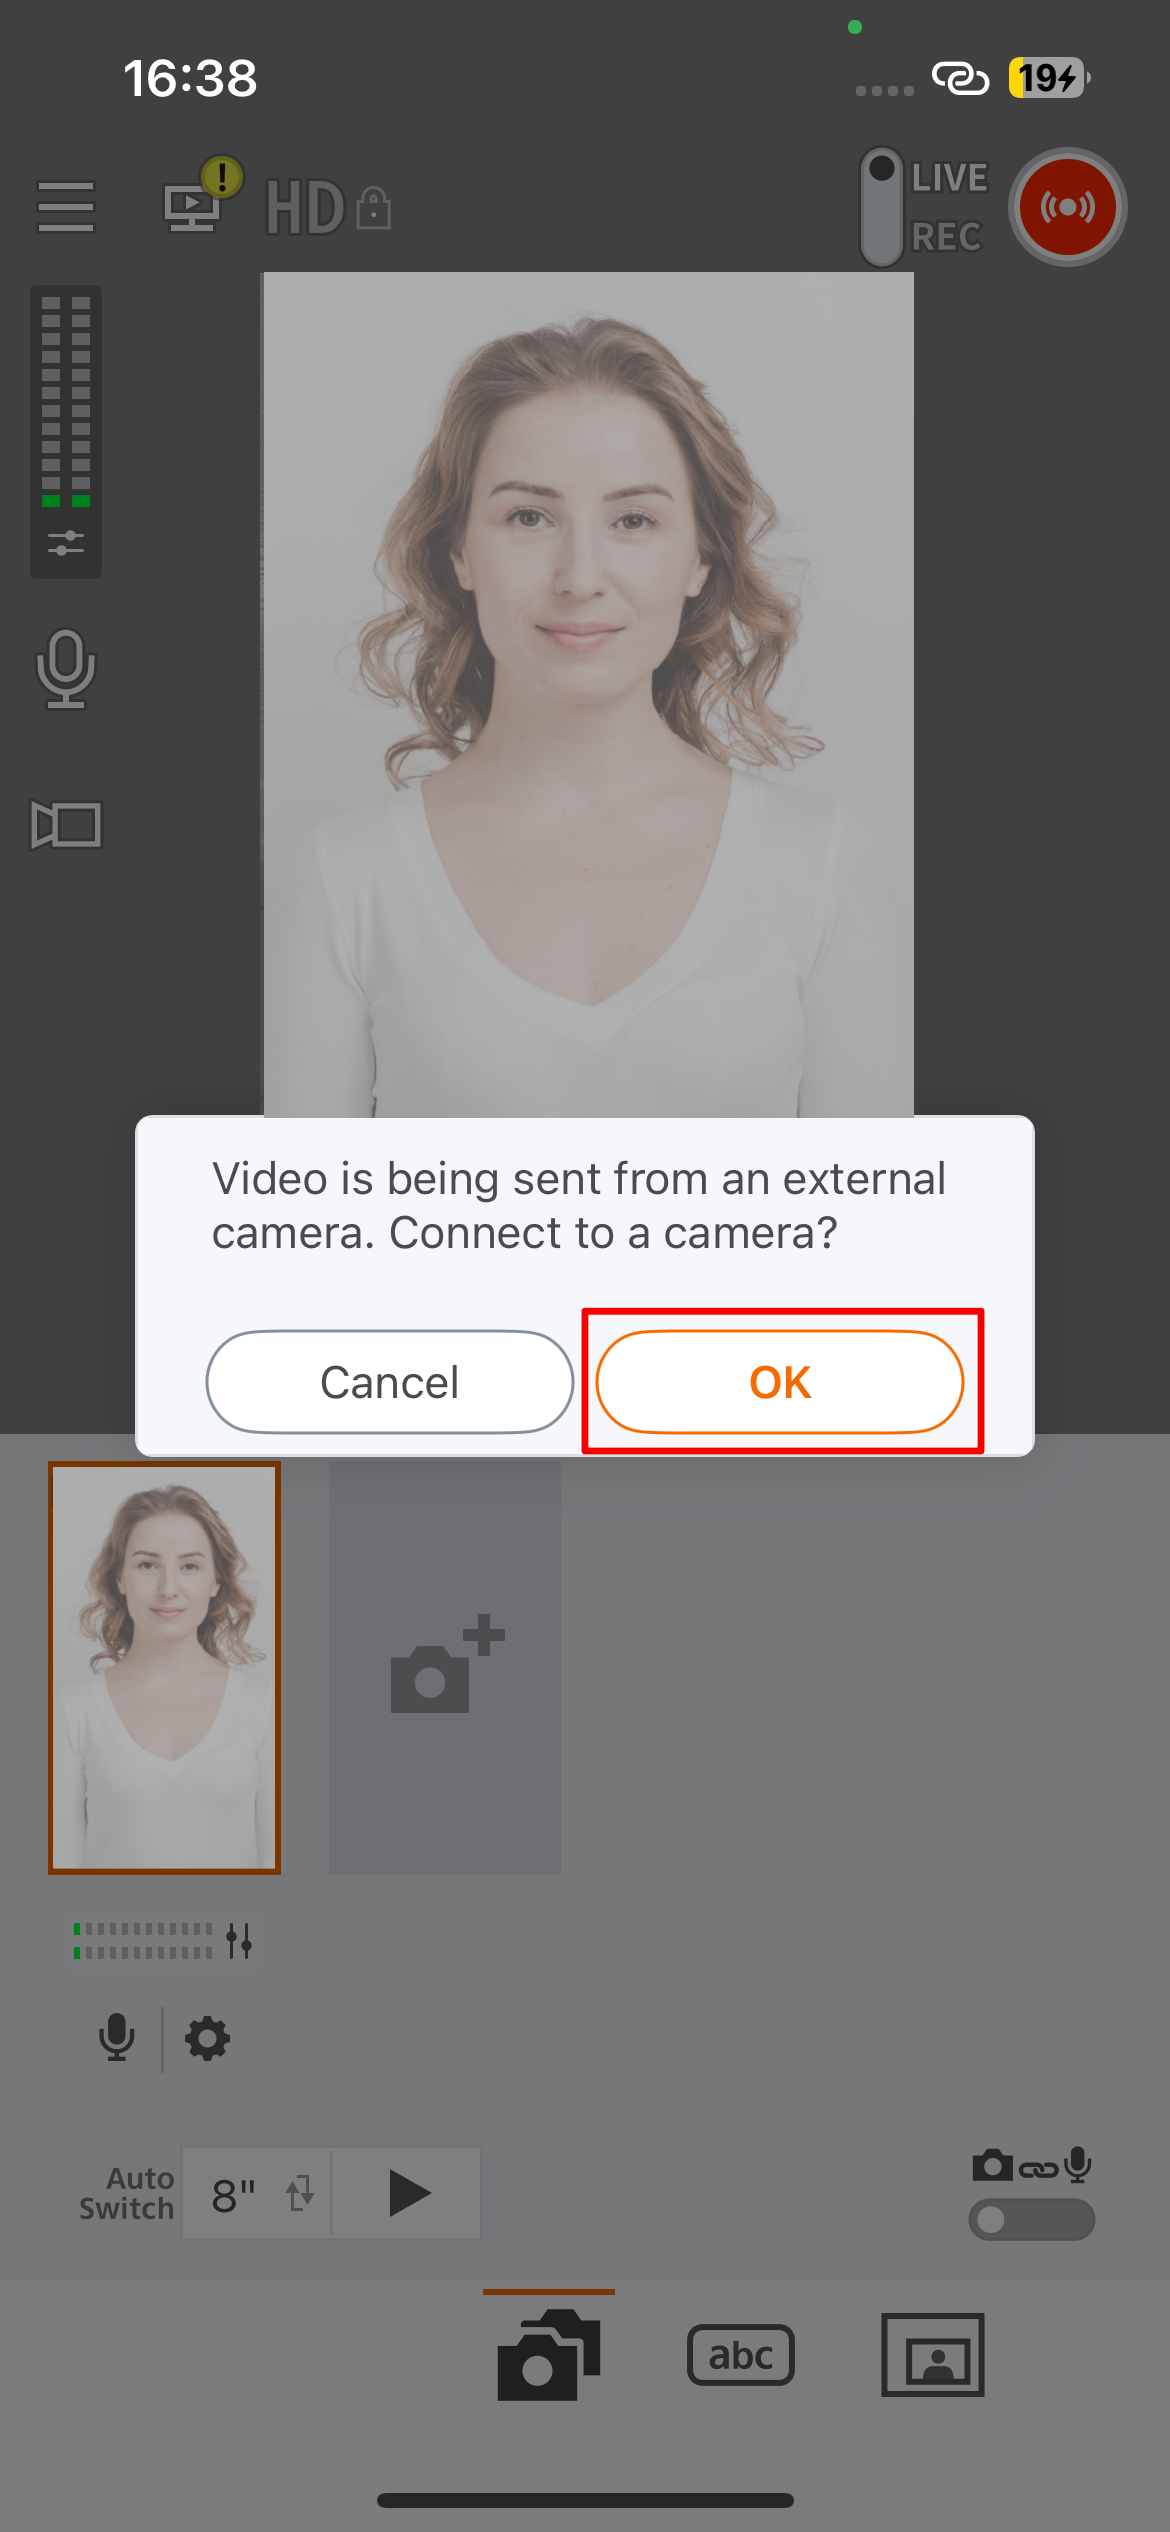
A message saying "Connect to a camera?" will be displayed on Live Switcher Mobile, so press the "OK" button.

Confirm that the camera feed is displayed on Live Switcher Mobile. The setup for sending the camera feed to Live Switcher Mobile is now complete.
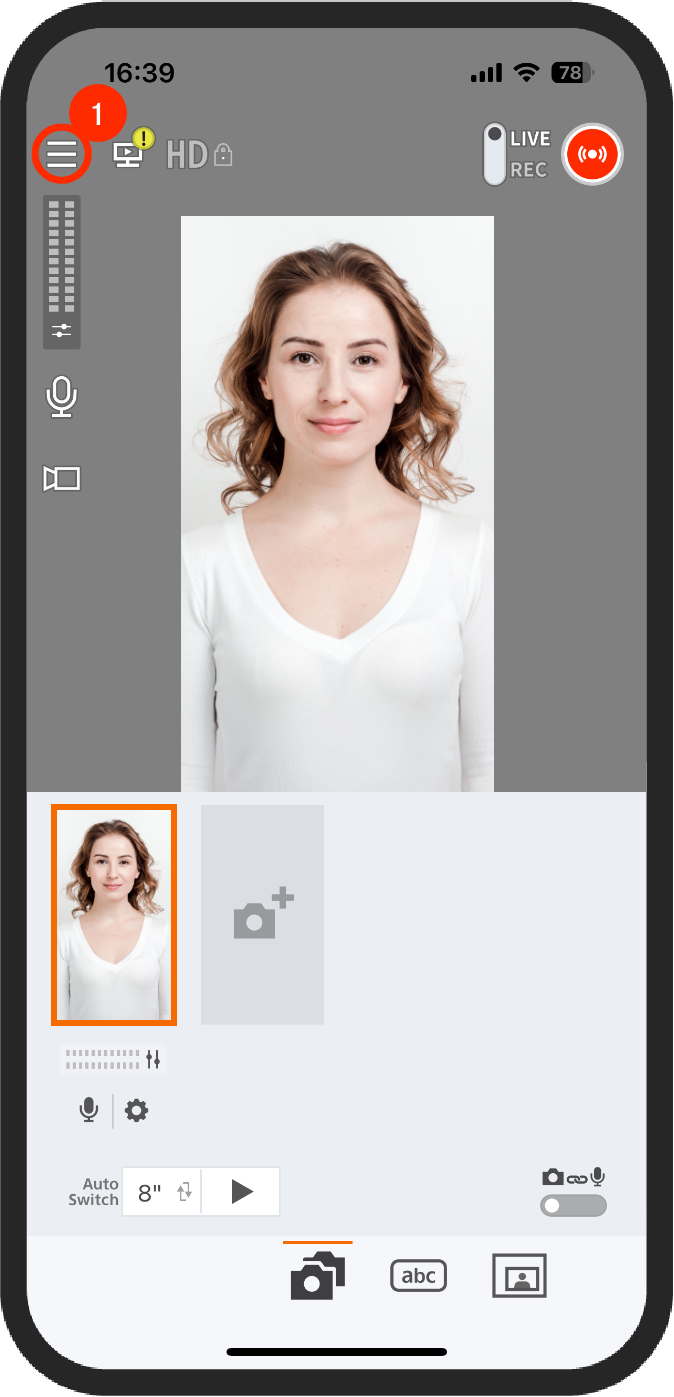
On the main smartphone, select connecting to the secondary smartphone. On the secondary smartphone, give permission to connect and enter the IP address to share camera footage.
With Live Switcher Mobile, you can use audio from multiple connected secondary smartphones.
You can individually set each secondary smartphone's audio to ON/OFF and adjust its volume.
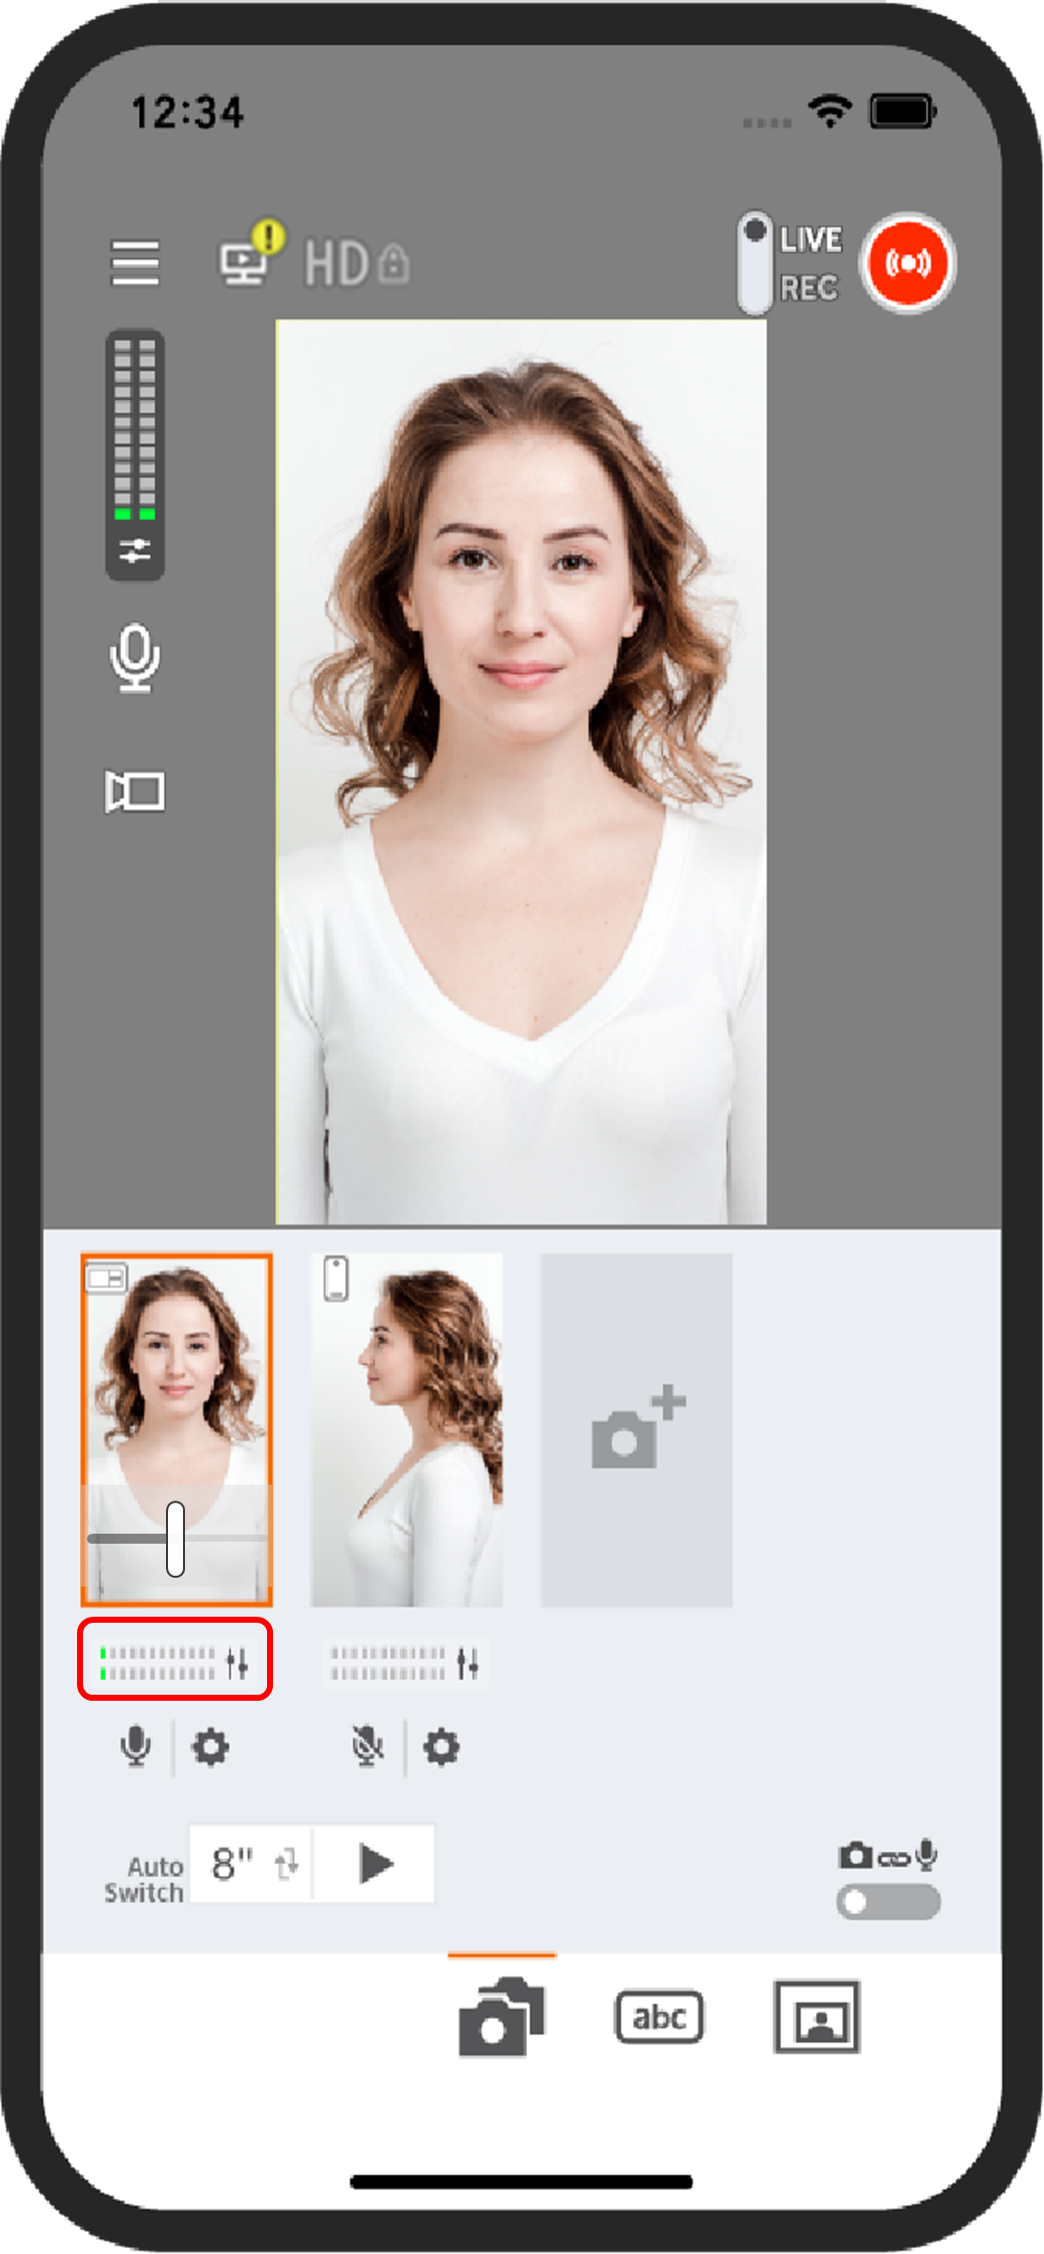
Tap the volume meter outlined in red to display the volume adjustment slider.
Move the slider left or right to adjust the volume.

Select "Audio ON/OFF" from the menu displayed.
Note:
- Since the same sound may be duplicated if input into the microphones of multiple secondary smartphones, it is usually recommended to use only one microphone.
Live Switcher Mobile has a captioning feature that allows you to freely display while streaming captions created in advance and saved as images By upgrading to the paid plan you will also be able to similarly save and display still images other than captions.
Live Switcher Mobile is not an app that provides a live streaming service.
When live streaming, set a video streaming platform such as YouTube or Facebook as the streaming destination, and decide your audience and title.
Ver. 1.2 adds support for Twitch. See below for how to stream on Twitch.
Tap the navigation menu

Select streaming platform

Select Twitch
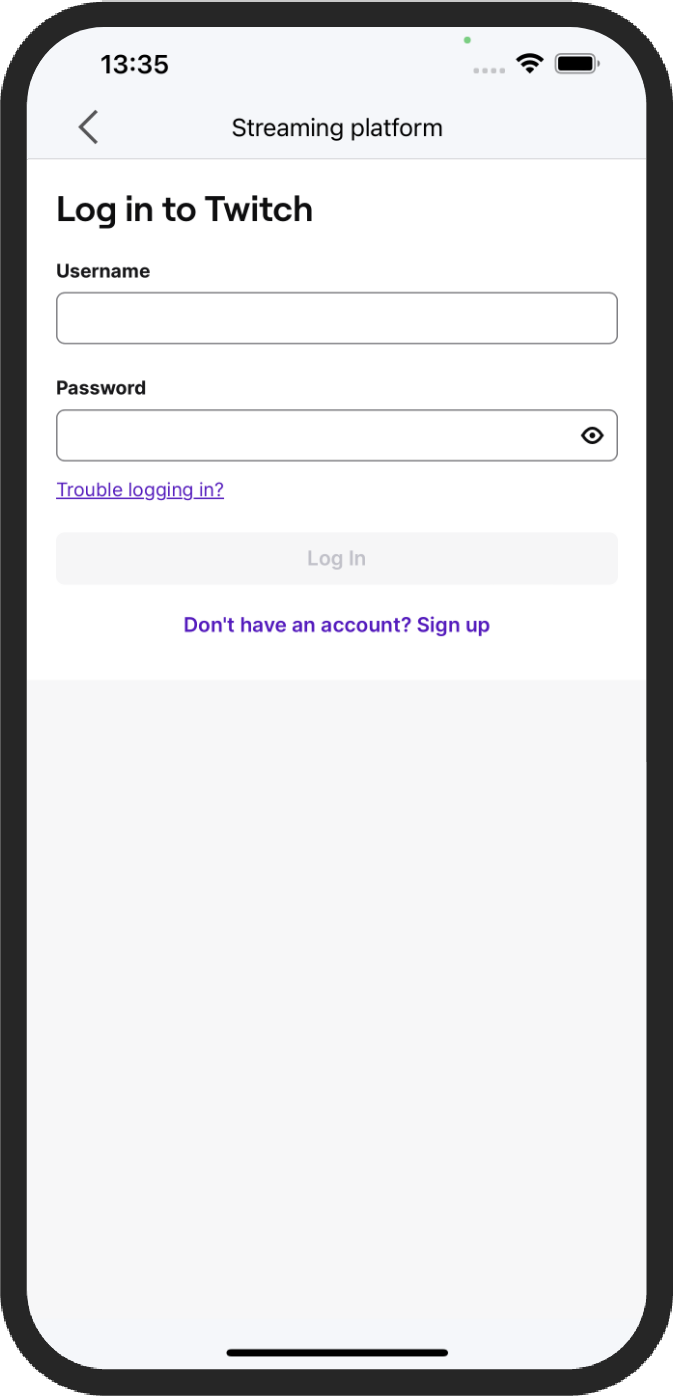
Enter your account info
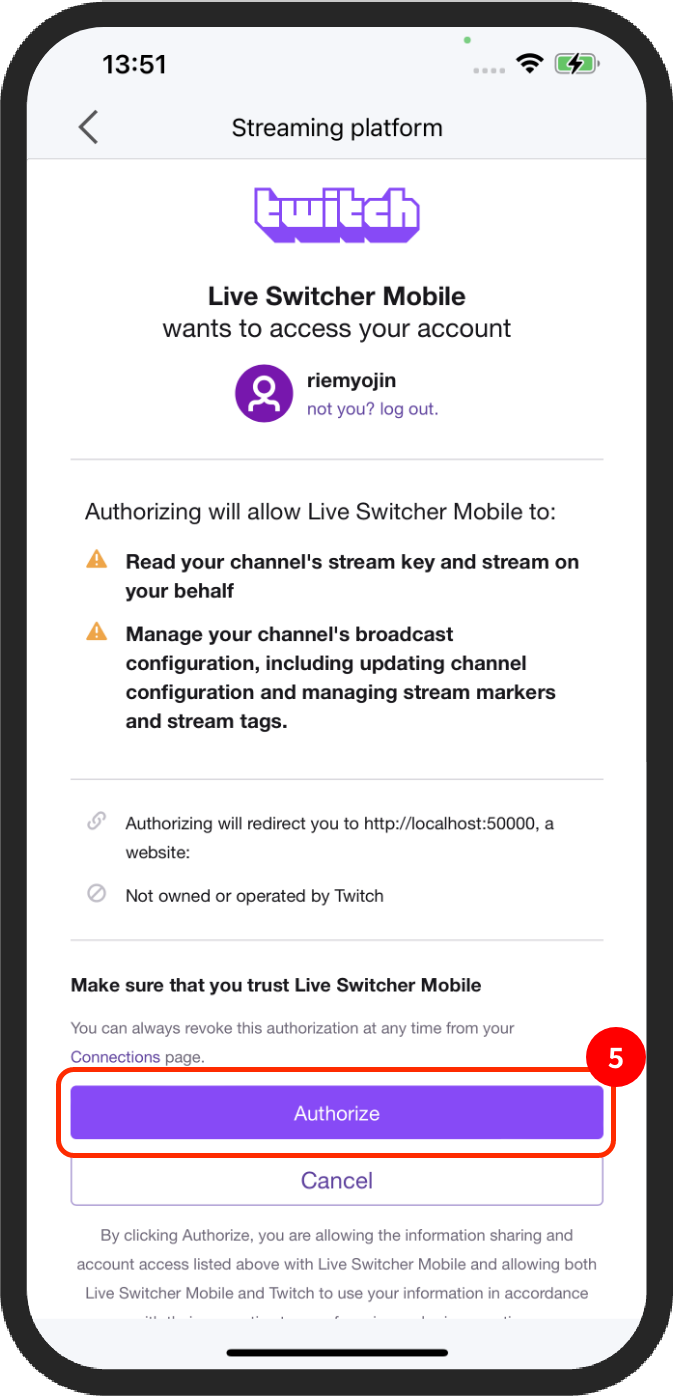
If an authentication screen appears, tap Allow
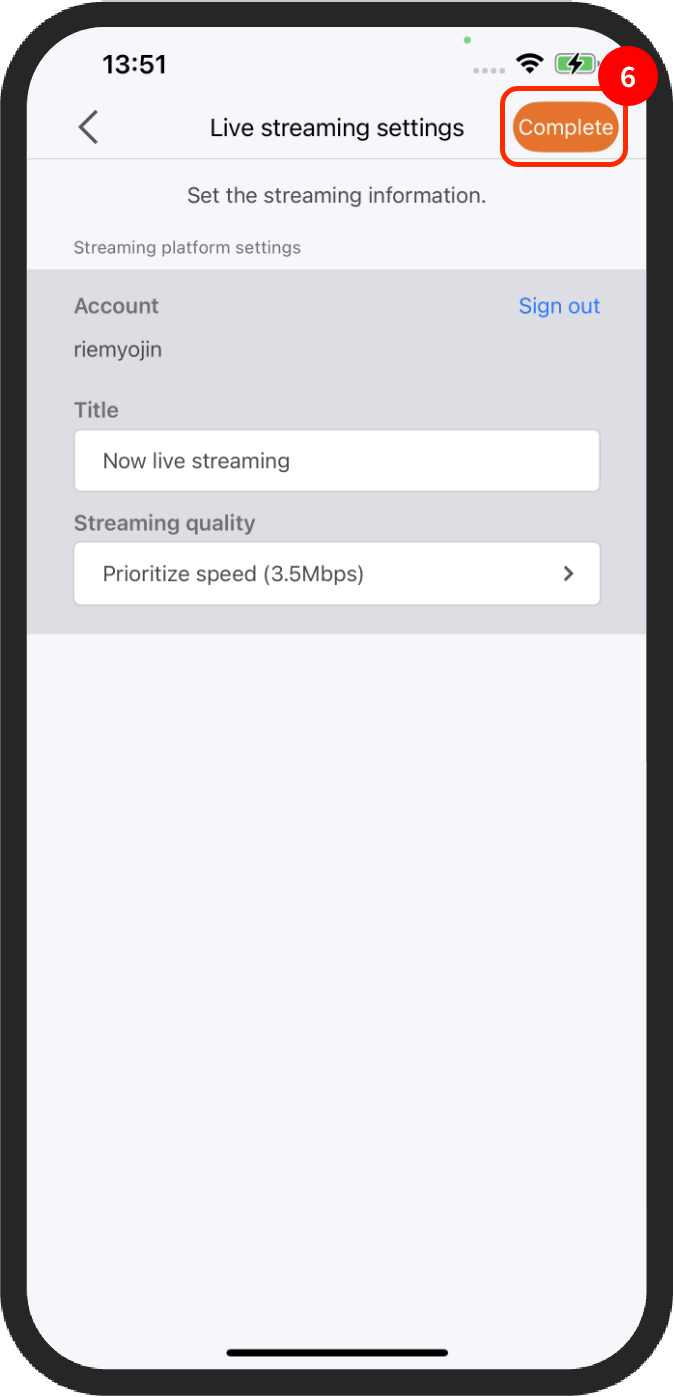
Make the live stream settings and tap Done
You can choose to display or hide the caption images saved as content in "(4) Creating captions and saving them as images" by tapping them at the appropriate time during streaming. Up to two caption images and still images (paid plan) can be displayed at the same time.
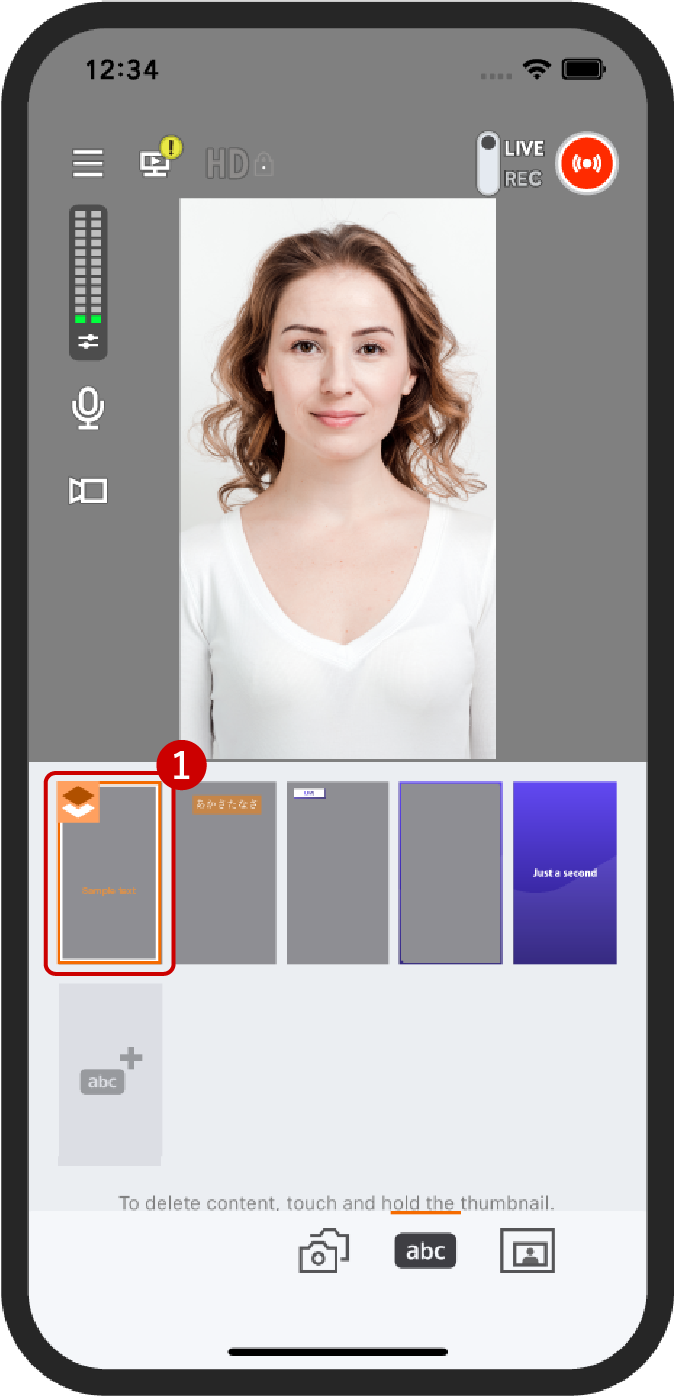
Tap the thumbnail of the caption image displayed in the content area at the desired time.
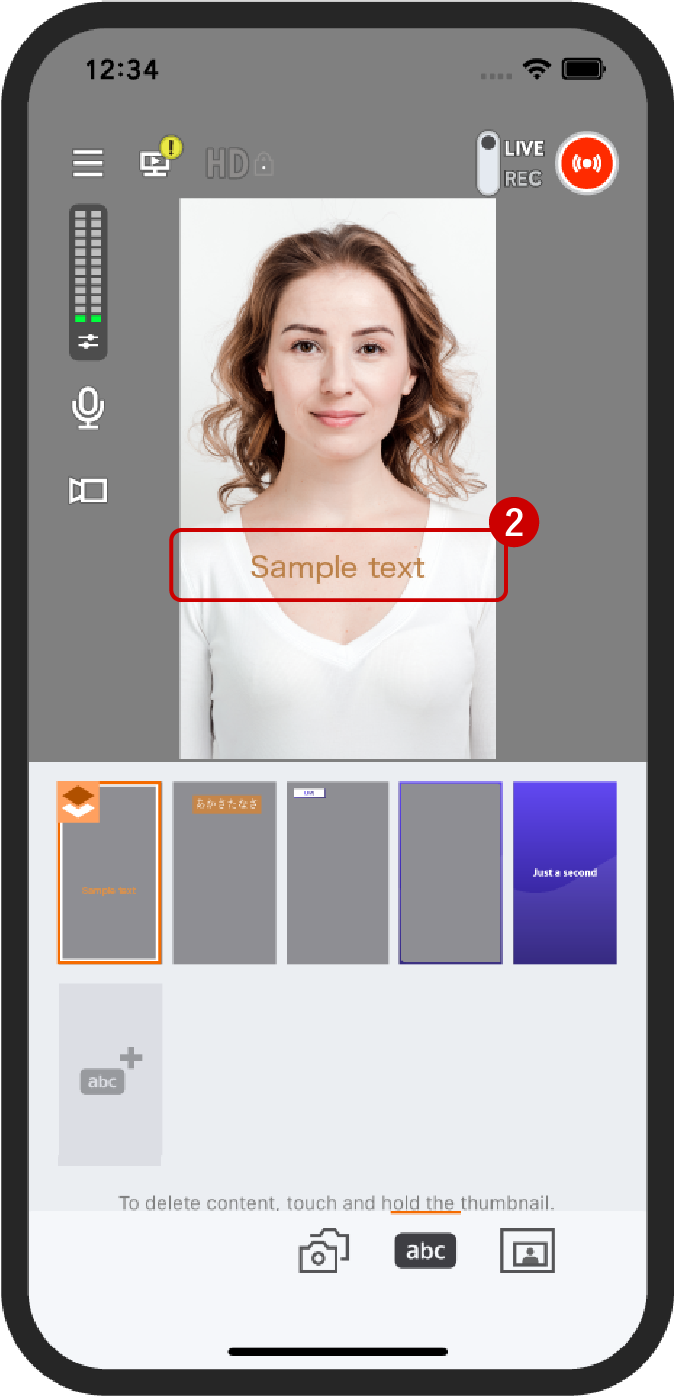
The caption image will be displayed. Tap the thumbnail once more to hide it.
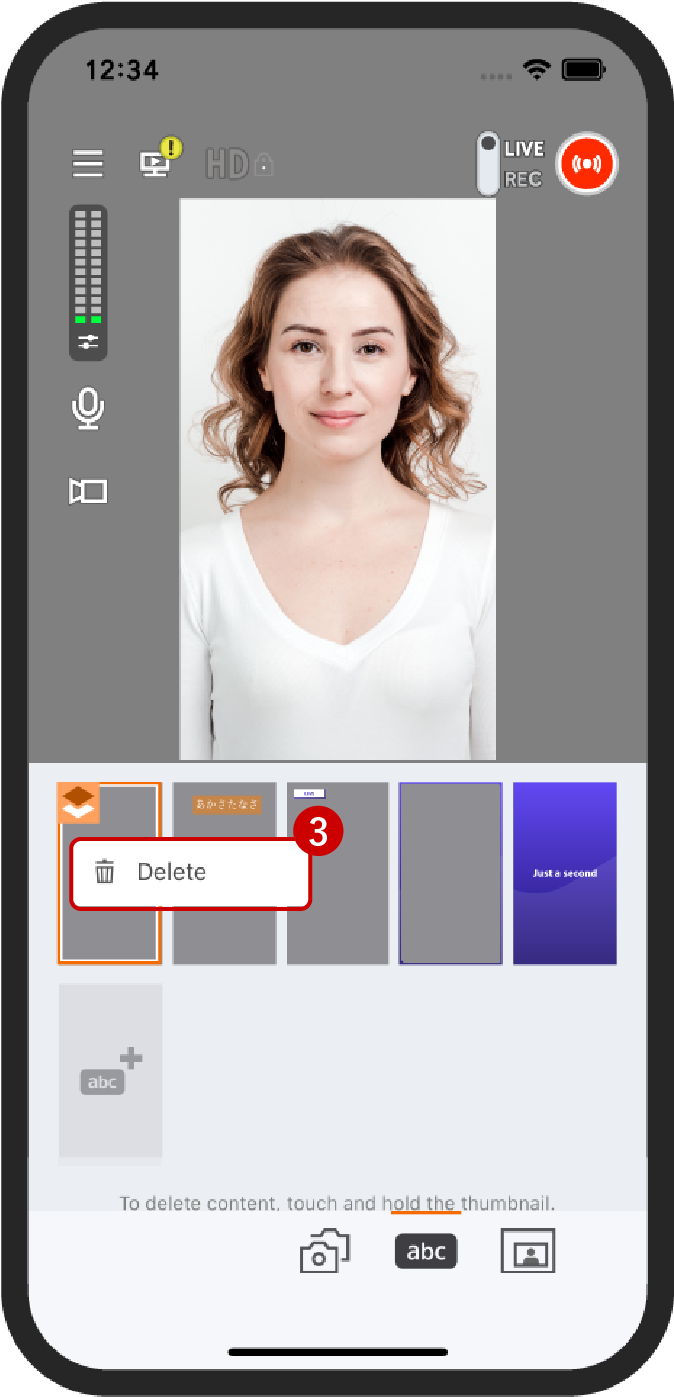
You can "delete" it by pressing and holding the thumbnail.
Note:
- Up to two caption images and still images (paid plan) can be displayed at the same time on the live streaming screen.
Live Switcher Mobile can display picture-in-picture (PinP).
To switch between the main screen and the wipe screen while displaying PinP, press the Switch button. The Switch button was added starting with Ver 1.2.

Note:
- When displaying PinP (Picture in Picture), in addition to camera footage from the secondary smartphone, you can also display images and videos stored on your smartphone (paid plan).
Attention:
- When the app is moved into the background, the connection to the secondary smartphone will be discontinued. For this reason, we recommend that you set up the streaming platform and share the streaming URL before connecting the secondary smartphone.